Tag Archives: photography

Sax-a-ma-phone


Sax-a-ma-phone, originally uploaded by jezza323.

Here is another Tair-11a candid shot. This is a very well known busker in Brisbane. He is mostly blind, and used to have a very old guide dog as his companion. Unfortunately the guide dog isnt around anymore, but he still busks in the Queen St mall.

If you like this shot, have a read of my Tair-11a Lens Review or have a look at my other Tair-11a shots

Blending Time – HDR Photography Part 3

HDR Photography

  1. Shooting a HDR
  2. Getting it off the Camera
  3. Blending Time
  4. Final Processing
  5. Some Inspiration

Time to Mix Exposures

If you have been following this series, at this point you will have taken some bracketed shots, grouped them together somehow, and then opened Photomatix, and set some options to have your images stacked together. Now we will cover the process of Tone Mapping your image down to 8 bits of information per pixel.

Checking Your Shot

The first thing you need to do is click the Tone Mapping button on the left in Photomatix. This will open the Tone Mapping dialog, with a preview pane to let you see the effect of the changes you are making. Once you have the preview pane available, you should check over it.
The things you need to check for are:

  • Alignment issues (even if you didn’t use the “Align source images” option, still have a quick check)
  • Ghosting issues (black or white “holes” in the image where moving objects appeared)

If you do find some issues, you can either leave them be, and fix them later in the GIMP or Photoshop (whatever your image editing app of choice is) or you can try the blending process again, with some different settings to try and reduce the effect.

Details Enhancer

Now all you need to do is Tone Map your photo, and you are pretty much done. However this is probably the hardest part of the process. There are just sooo many options, which change the results so much. When I first started I had a basic favourite few settings, and I would jiggle the sliders a little on 2-3 options, and that as about it.
After some time of this, and a bunch of rather boring HDR images, I went googling for some inspiration, and came across this set of “presets” from Stuart (whoever Stuart is!) – Stuart’s Photomatix Presets. Now there are quite a lot of presets here, and it has taken me some time to get to grips with them all, but the process I used when I first downloaded them, was to go through, and select each one, and see the result for myself in the preview window. I would then choose the one I thought looked best, and make minor adjustments (usually lower the Colour Saturation, and maybe make it a bit brighter or darker with the White/Black level sliders) and go with that.

Now that I have been using that method for a while, I know what sort of results I can expect from different Presets, so if I know a certain look will work with the image I’m working with, I can go straight to that preset, make some minor adjustments and I am done. I have also created some more Presets of my own. Most of mine are minor adjustments of the downloaded Presets, but they work for me in saving time and effort exploring all those sliders every time.

Tone Compressor

The Tone Compressor method of Tone Mapping is not one I have used very much to be honest… I find I am unable to get a good contrasty image out of it, every time I try I end up with an image with flat colours. It does tend to avoid that nasty halo-ing you get with the more “extreme” Details Enhancer methods though. I used the Tone Compressor method on this Project 52 photo – Project 52 – #1 – It Begins, but as I look back on it now, I do find the colours a little flat. Definately have a play around with this one though, it is far simpler to understand, and if you keep an eye on the Histogram as you make changes you will get a good idea of what each slider does.

Macro Photography Techniques – Part 7 – The Forgotten

Well I have to revisit this series which I thought was complete. Al Williams (see his photography blog) contacted me to remind me that there is another way to take macro photos which I hadn’t mentioned at all, close up filters!

Macro Photography Techniques

  1. Close Focus Lens
  2. Teleconverters
  3. Extension Tubes
  4. Reversed Lenses
  5. Macro Lens
  6. Combining Techniques
  7. Close Up Filters

Close Up Filters

Close Up filters are actually lenses which mount to your regular lens via the filter mount. There are a few different types available. They provide extra magnification without altering too much else. The filters are available in various levels of magnification, various sizes, and all kinds of quality levels (and prices too). The most popular type I have seen discussed is the Raynox DCR-150 and DCR-250. These are high quality lenses which have a quick mount/dismount clip rather than the standard threaded mount for the lens. The Raynox lenses are not available in varying sizes though, so you are somewhat limited as to which lenses they can be mounted to. The standard screw mount filter was very popular in the past, so it can be quite easy to find a “set” 2nd hand. A set of close up filters is usually made up of 3 filters, all the same filter size, but in varying amounts of magnification. These filters can be used individually or in combination to get various levels of magnification.

Image Quality

I have never tested a set of close up filters myself. I do have reservations about the loss of image quality which may occur when using these lenses. Having said that, the loss in quality from a high quality filter/lens should be no more than the loss you get from using a UV filter. When looking to buy a filter (or a set) I would recommend paying some extra money, and sticking to the well known brands. I would imagine that when using the “set” of filters, combining all 3 may result in a noticable loss of quality (after all it is 3 more lenses for the light to pass through) but if it provides the magnification required then its more than good enough. These sets of filters are usually numbered based on the amount of magnification they give. A typical set consists of a #1, #2 and #4 filter, where #4 gives the most magnification.

Al’s Shots

Al not only told me to get my finger out and stop forgetting stuff, he even kindly offered to take some photos using his set of close up filters, and share them with you on the blog. So here they are. You can see other shots Al has taken on his flickr account. All shots were taken with the Pentax SMC M 50mm f2.0 lens @ f8.0, 1/15 sec and ISO 500 and at minimum focusing distance.

Lens only (no filter)
With Close Up Filter #1
Vivtar Close Up Filter #2
Vivitar Close Up Filter #4
Vivitar Close Up Filters #1 & #2
Vivitar Close Up Filters #1, #2 & #4

As you can see, the magnification differs quite a lot between the filters, and the combinations of filters. So there is yet another way to take some great macro photos. Big thanks to Al for pointing out my error in missing this option, and even bigger thanks for providing the images.

Infrared Digital Photography with an R72 Filter


Botanic Gardens in IR
Originally uploaded by jezza323

This shot is from me playing around with an IR 720nm filter. This type of filter blocks all light below the 720nm wavelength. This means some reds, and infrared are the only light which can pass through. By using 1 of these filters on your camera, you will get some interesting results.

Unfortunately most modern cameras have an IR reduction filter mounted to the front of the sensor, which means that blocking visible light will result in very long exposures being required. This particular shot was taken in broad daylight, at f11.0, ISO 200 and required a 30 second shutter speed! 30 secs in broad daylight is quite a lot. A typical exposure in this situation would be around about 1/400 sec!

The main features of IR photography are black skies, and white leaves on trees and grass. This results in cool contrasty shots where things are just a little different to the norm.

The Desaturated Look


Untitled
Originally uploaded by jezza323

This is a shot I took during the week. I quite like this style of shot, so I thought I would share the preset I used.

The preset is called “PH Fashion Shoot II” and I found it at this site. I recommend downloading this set of presets (even if you don’t intend on using them) and just having a look at the settings they contain.

Enjoy!

Street Photography – Progress? – Part 4

Street Photography

  1. Previous Attempts
  2. Zone Focusing
  3. Hyperfocal Distance
  4. Progress?
  5. Tips and Tricks From the Web

So far I’ve talked about street photography focusing techniques. I haven’t had much time to go and put those techniques into practice yet, but I did get 10 mins yesterday lunchtime and 5 mins the previous afternoon on my way to the train station, so lets see how I went

Hyperfocal Distance

This shot was taken with the K200D and Pentax SMC M 28mm f2.8 lens. I set the lens to f11.0, and approximately to hyperfocal distance (I used the Depth of Field scale on the lens focusing ring). I then set the exposure (Pentax M lenses must be shot in manual mode if you want to stop them down). I was then able to take a photo of pretty much anything that was more than about 1.8m away from me, and it should be in focus. This is the shot I took of some workers on their way to the train station. If you go to Flickr and view larger, you will see that the further away from the camera the worse the focus gets. Did I possibly focus too closely to get true hyperfocal distance? Something to work on for next time.

Zone Focusing

This shot was taken with the K200D and the Pentax A 50mm f1.7 lens. The longer focal length of this lens means that the hyperfocal distance is quite far, so you can’t get close to the subject, which means you end up cropping the shot to make them the subject of the photo. So when using a longer focal length I recommend using the zone method. I gave this a shot in the pedestrian mall yesterday. I set the lens to f8.0, and the focus to 3m on the focus ring distance scale. This is where I estimated most people would be walking by from where I was positioned. I then proceeded to snap away. This is 1 of the resulting shots. The focus was set a little in front of the couple I was photographing in this shot, so they are slightly out of focus, again something to work on. I will post another image tonight.

Tips and Attempts – Street Photography Part 1

I have decided to try to get better at shooting some street type stuff. I have done a little of it before, but not very successfully. So this will be the start of another series, this time all about street.

Street Photography Series

  1. Previous Attempts
  2. Zone Focusing
  3. Hyperfocal Distance
  4. Progress?
  5. Tips and Tricks from the Web

I sent Javier (who writes the Street Vision blog) a message the other day asking for some advice on focusing techniques. He suggested using hyperfocal distance and zone focusing, he also suggested I write an article on the subject, which I will when I have experience in using them. This has been a bit of a catalyst for me to try out street shooting again, and write about my experiences, successful and not. I will be posting a number of links in this series as I learn by reading others work, so be prepared for some clicking.

I will start the series with some of my previous attempts at street shooting. I believe most are pretty boring, but they are street shots none the less. Lets see if I can improve the shots as this series goes on!

If you are a street shooter, let me know your tips to include, if you want to share your own street shots, post those too!


Macro Photography Techniques – Part 4

The 4th installment of the macro photography techniques series will cover reversed lenses, and my experience using a reversed lens. A reversed wide angle lens can give very high magnification.

Macro Photography Techniques

  1. Close Focus Lens
  2. Teleconverters
  3. Extension Tubes
  4. Reversed Lenses
  5. Macro Lens
  6. Combining Techniques
  7. Close Up Filters

Reversing Your Lens

The idea behind a reversed lens, is to use a wide lens (I use my Pentax M 28mm) because it is designed to take a large image, and project it onto a small spot (the sensor). If you reverse that lens, it is then taking a small image and projecting it onto a large area. To reverse your lens you will need a reversing adapter. This adapter has a standard lens mount on it, and a thread mount on the other. You need to get a thread mount in the correct size for the lens (or lenses) you wish to reverse. My Pentax M 28mm has a 49mm filter thread, so I needed a 49mm Pentax K reverse mount.

To mount your lens, you simply screw the adapter into the filter thread of your lens, then mount the lens using the adapter’s K mount (or whatever mount you are using).

Aperture?

When using a reversed lens, there is no way for the camera to operate the aperture of your lens, so you will want to use a lens which has an aperture ring that allows you to set the desired aperture. Some of the newer digital lenses do not allow this.
The second problem this can cause, is if you want to use a smaller aperture (larger f-stop number) it will be very dark to look through the viewfinder, this can make composing and focusing your shot very difficult. This is one of the drawbacks of using the reversed lens method.

Focusing

This method of macro photography will require a very close working distance. Working distance is distance from the subject to the lens. So be prepared to get down and really get in close to your subjects. The other thing it means is a very very narrow depth of field, sometimes it can be so narrow you will find it hard to get something in focus.

To focus with a reversed lens I still use the handheld, moving back and fowards method I described in Part 1, however, I take many more photos of a single subject than I would using the other methods. This is because the viewfinder is often dark (I try to use the smallest aperture I can get away with) and because the depth of field is so narrow. The hope is that at least 1 of the photos I take of any particular subject will have the focus in the correct position.

Results

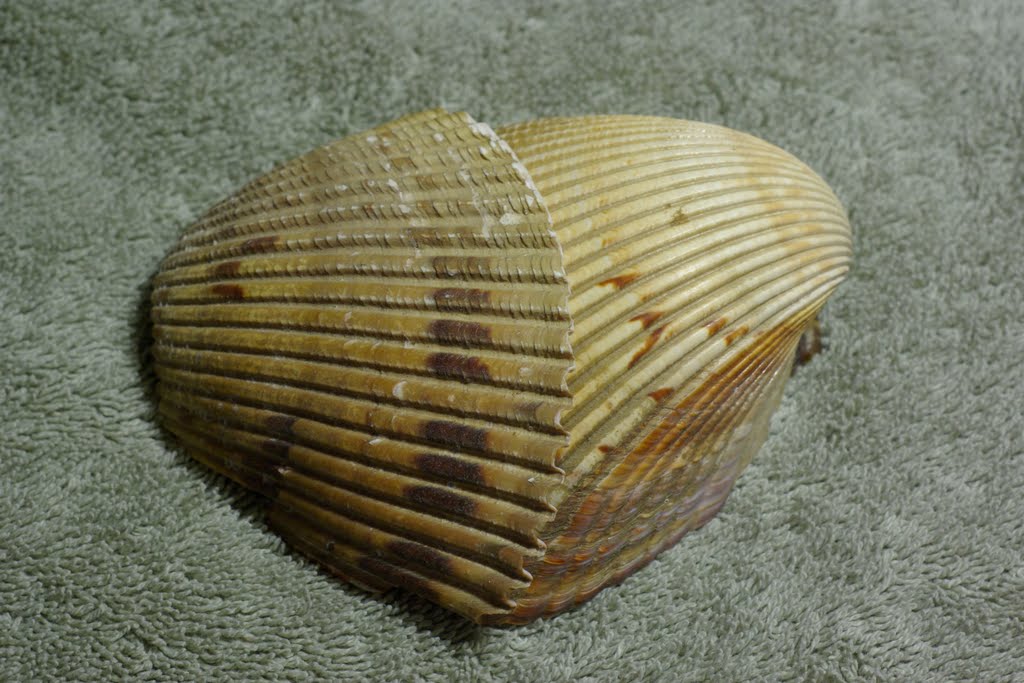
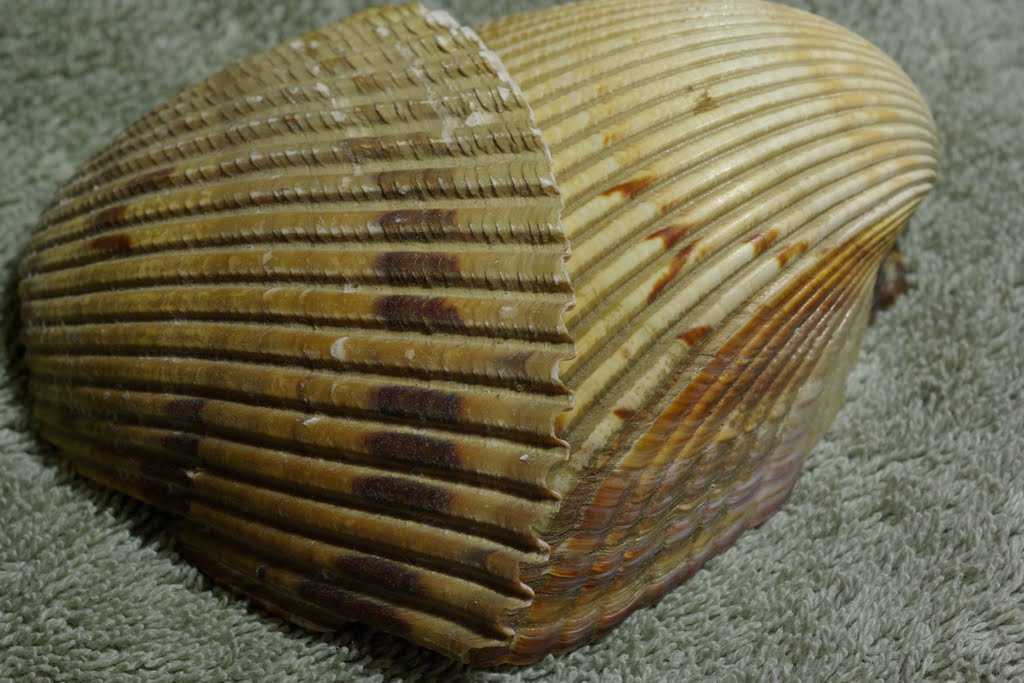
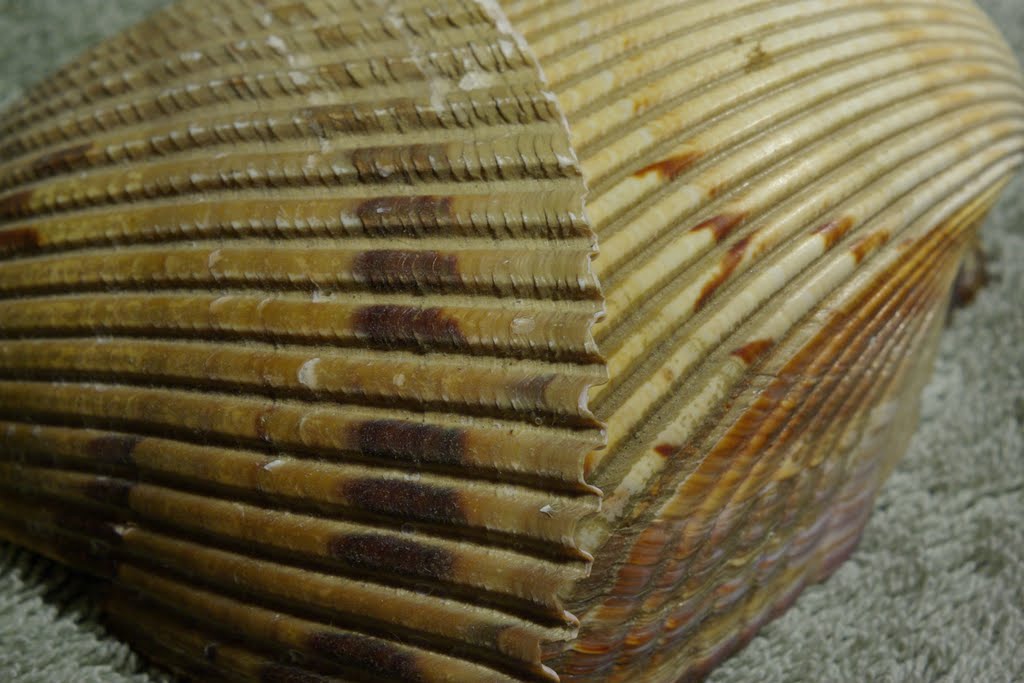
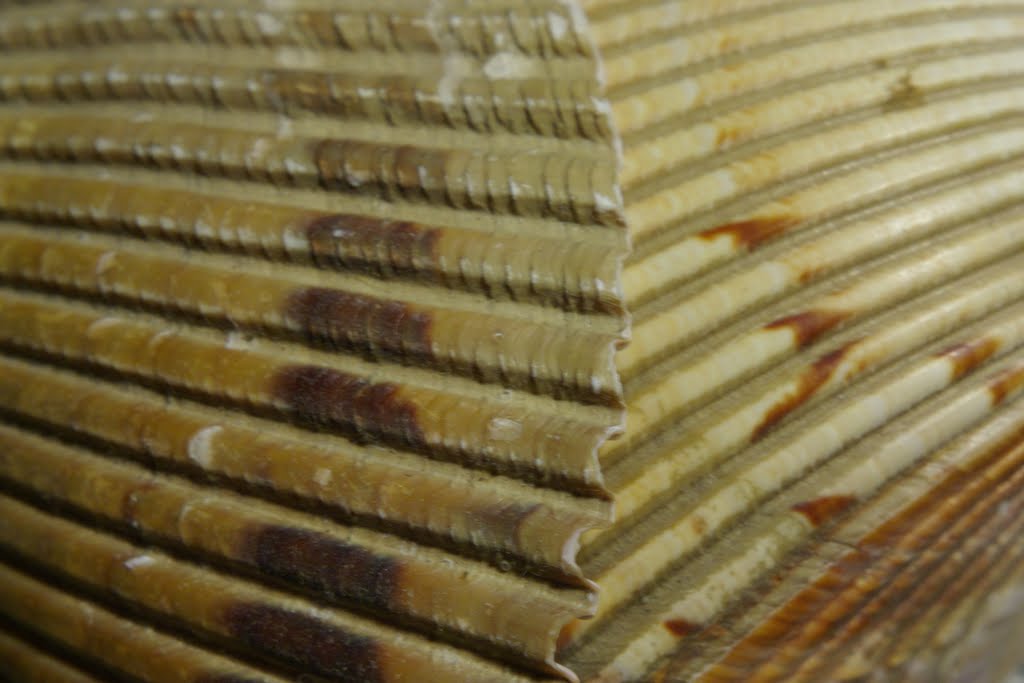
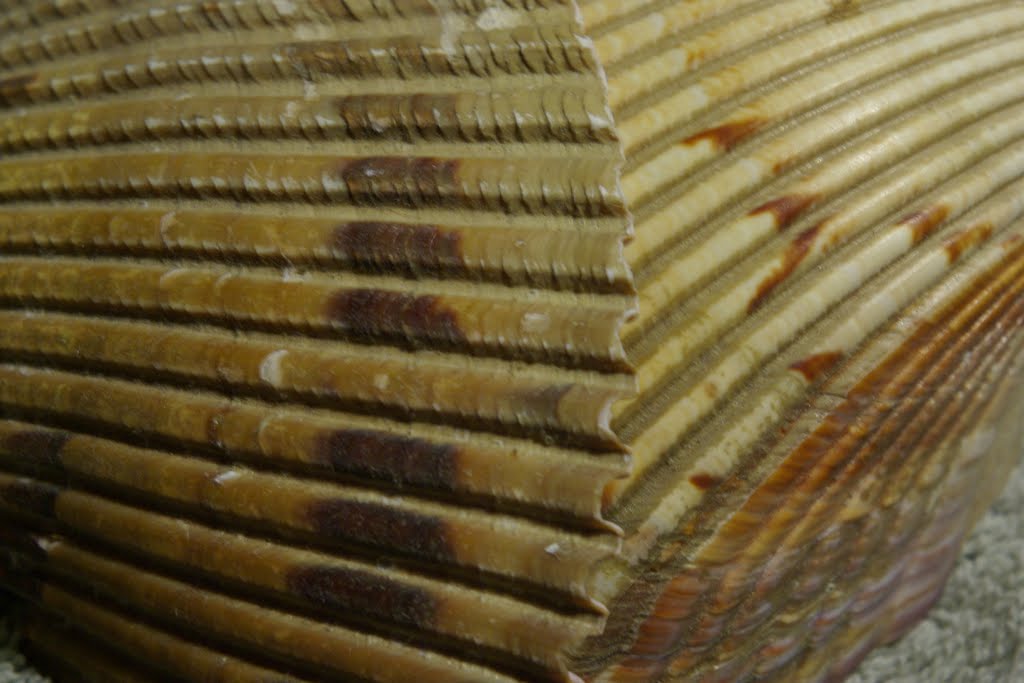
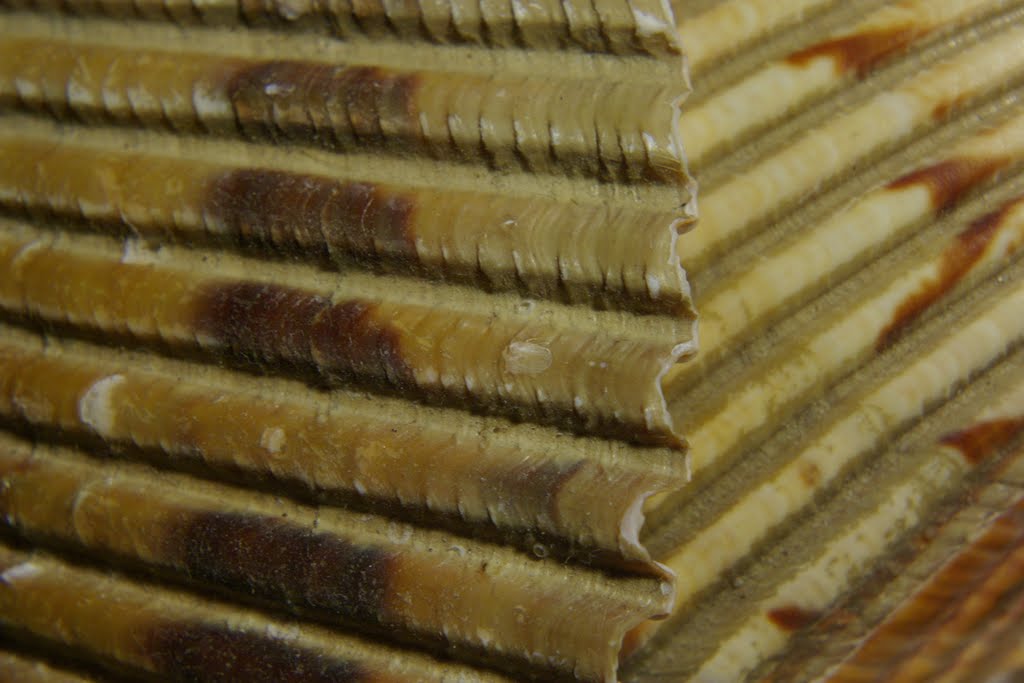
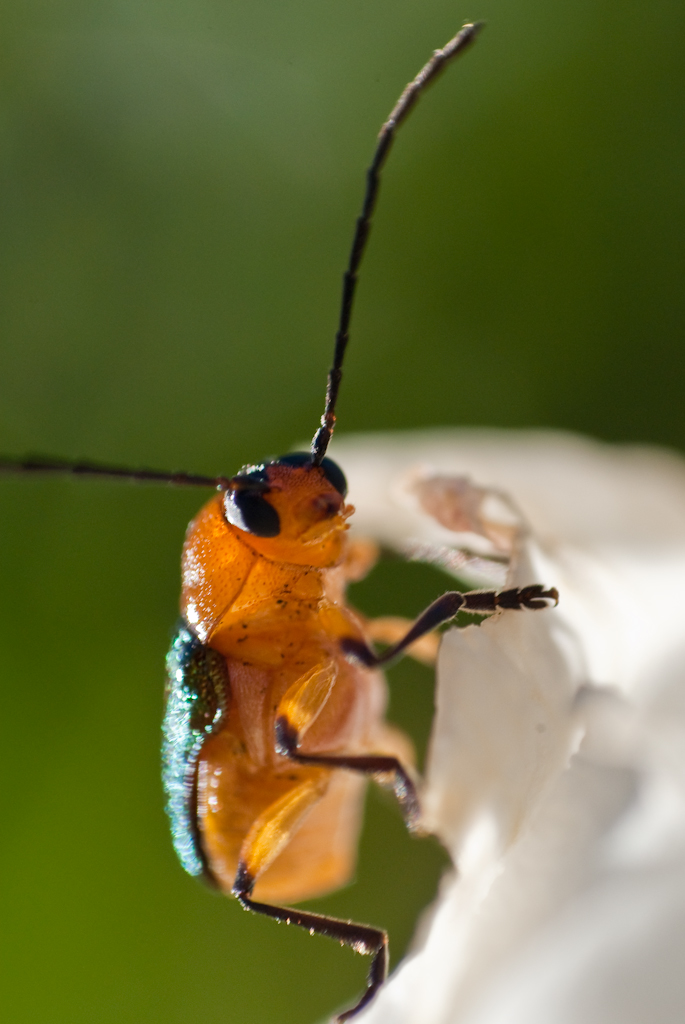
Here are a couple of photos taken using this technique. You will notice the high magnification of these subjects, this is the power of the reversed lens.

reversed 28mm lens, ISO 100, f11 or so from memory, 1/180 sec, onboard flash fired.
Reversed 28mm lens, ISO 400, f4 or 5.6 from memory, 1/400 sec
UPDATE: I have added some shots of my Pentax SMC M 28mm f2.8 lens reverse mounted on my K200D, and a photo of the reversing adapter itself to my Part 5 post

Project 52 – #2 – Kurilpa Bridge


Kurilpa Pedestrian Bridge, originally uploaded by jezza323.

Buy art

This is the 2nd shot for my 2010 Project 52 – “Brisbane Landmarks”

This is the recently completed Kurilpa Bridge, a Pedestrian Bridge from the Brisbane CBD over the Brisbane River to West End/Southbank.

This is a 3 shot HDR, taken with my Pentax K200D and Pentax SMC DA 18-55mm AL II

Base shot was 18mm, ISO 100, f9.0, 5 sec, bracketing was at +/- 2.0 EV

UPDATE – Processing details now posted – sorry for the delay.

Shot and Processed as follows:-

  • Shot in Pentax RAW (PEF)
  • Imported into Lightroom 2.5
  • Exported to 16-bit TIFF
  • HDR Generated using Photomatix
  • Tone Mapped using Details Enhancer (settings shown below)
  • Save-as 16-bit TIFF
  • Import into Lightroom 2.5
  • Minor editing applied using adjustment brush to remove some unwanted detail on the right of image (brush positioning and settings shown below)
  • Increased Blacks and Brightness
  • Exported to JPG for Web


Bird and Stair Testing the Tair-11a


Bird and Stair Testing the Tair-11a  

Originally uploaded by jezza323

I have already used this one in my Tair-11a review, but I just have to share again. This shot really works for me.

Taken with the Tair-11a at f2.8 (wide open), ISO 100, 1/640.

Post Processing as follows:-

  • Shot in Pentax RAW (PEF)
  • Imported in Lightroom 2.5
  • Exported to JPG for Web

No editing at all!

If you like this shot, have a read of my Tair-11a Lens Review or have a look at my other Tair-11a shots