Tag Archives: ir72

Wellington Point Pier – Hoya R72


Wellington Point Pier
Originally uploaded by jezza323

Buy art

 
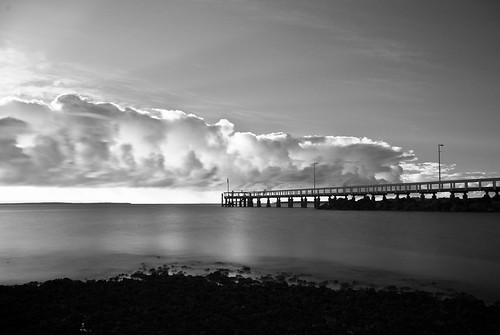
Wellington Point Pier at sunrise while the sun was behind a large bank of clouds.

Single exposure taken at 18mm with the Pentax K200D and Pentax SMC DA 18-55 AL II lens. Shot at f8.0, 30 sec, ISO 200.

This shot is Infrared, shot using a Hoya R72 filter. All editing done in Lightroom 2.5 (clarity, blacks, white balance, greyscale, contrast)

I really like the extra contrast you get with the R72 filter. The required long exposure didnt hurt the smoothness of the water either

More Digital Infrared (IR) Photography


Mt Cootha Sunrise in IR
Originally uploaded by jezza323

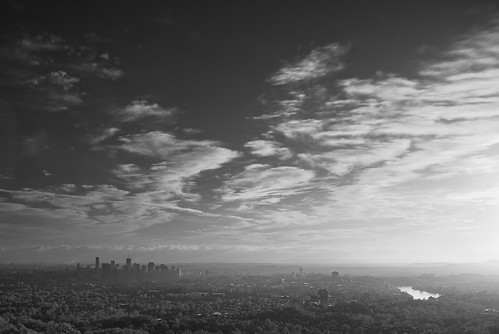
Here is another shot I took recently with my R72 type filter. In this case I used a Hoya R72 filter mounted to my Pentax K200D & Pentax SMC DA 18-55 AL II combo.

This shot was processed entirely in Lightroom 2.5 (no photoshop trickery going on here!). You can see here the effect quite well, the sky is nice and dark, while the trees are a bit brighter than they would otherwise be. If you compare closely to the image below you can see the difference quite well. The general contrast is also much stronger.

This is the same shot, but taken without an IR filter, just converted to greyscale in Lightroom.
And here is the IR shot in colour (with corrected White Balance and Exposure in Lightroom 2.5). This is what was coverted to greyscale to get the IR image above.

Infrared Digital Photography with an R72 Filter


Botanic Gardens in IR
Originally uploaded by jezza323

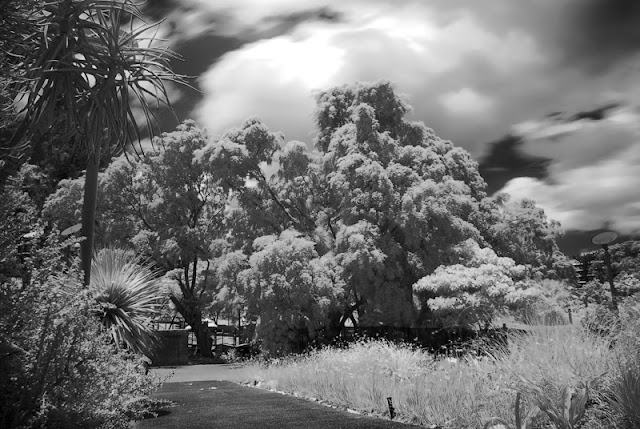
This shot is from me playing around with an IR 720nm filter. This type of filter blocks all light below the 720nm wavelength. This means some reds, and infrared are the only light which can pass through. By using 1 of these filters on your camera, you will get some interesting results.

Unfortunately most modern cameras have an IR reduction filter mounted to the front of the sensor, which means that blocking visible light will result in very long exposures being required. This particular shot was taken in broad daylight, at f11.0, ISO 200 and required a 30 second shutter speed! 30 secs in broad daylight is quite a lot. A typical exposure in this situation would be around about 1/400 sec!

The main features of IR photography are black skies, and white leaves on trees and grass. This results in cool contrasty shots where things are just a little different to the norm.

IR72 Filter exposure issues

Along with my cheap ND400 I bought a cheap IR72 filter, again just to play with the effect more so than anything else. Again the filter is for my DA 18-55 AL II lens which I would like to replace in the future.

As some people may know, DSLRs have a filter in front of the sensor which blocks most of the IR wavelengths of light at upto 95% effectiveness. This means that when you go and place a filter in front which blocks all visible light below 720nm (like an IR72 filter) your required shutter speeds get VERY long.

Upon receiving my filter I went about taking some shots at ISO1600, 0.5sec, f4.5 handheld (got to love that Pentax Shake Reduction). What I found was that the images just came out like I had a red filter in front, not very IR at all. Today I finally got my tripod out and did some testing, I found to get a proper IR like image I needed to shoot at around ISO400, 30sec, f11 in broad daylight. The effect that you want from an IR filter is tree leaves and grass coming out white, while everything else is more like a black and white image (probably with a very red cast to it from the camera though!)

So here are some key points for shooting IR with a modern DSLR which has the sensor IR block filter still in place.

  1. Shoot RAW – you will need to play with the white balance quite a lot to get a decent image. RAW also allows some give in exposure which means you dont have to get it exact (I am finding it hard to find the sweet spot).
  2. Shoot in Manual mode – you will need to play with aperture, ISO and shutter speed to get a good exposure. The camera won’t really know whats going on.
  3. Go for LONG exposures – If the shots are not coming out how you expect (looking for grass and trees to have white leaves) don’t be afraid to up the exposure some more, and then some more again! Remember I needed to go to 30 secs at ISO 400 to get the proper effect with my camera. Different cameras will have different filters on the sensors though, so play with your camera to find out what works for you.
  4. Check your focus – AF should still work fine, however, it may shift slightly from what is the correct focus distance (due to light wavelengths). So make sure you check that the things you want in focus are actually in focus.