Tag Archives: processing

Subway


Subway, originally uploaded by jezza323.

Buy art

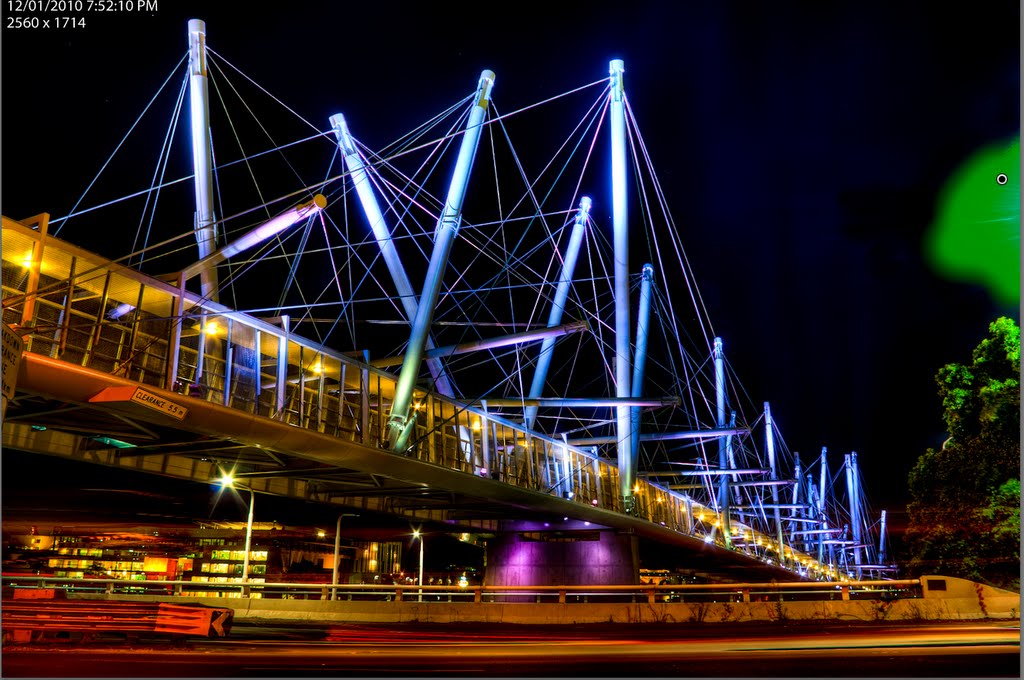
The final shot which I will blog from my Saturday morning walk in downtown. I was finished up, so I headed down to the subway to go home.

Packing Up

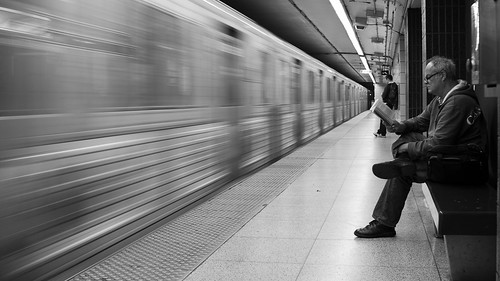
As I sat there removing the Tair-11a from my Pentax K200D body, and the tricky M42 adapter ring, I noticed this man reading quietly next to me. Looking down the platform I decided it would be worth getting a shot of the train pulling into the station.

Preparation

I popped the Sigma 30mm lens on, dialed in a slowish, but not too slow exposure and waited for the train to arrive. Fortunately my subject remained seated and reading until the train came to a complete stop, so I was able to get the shot I was looking for. I actually fired off 4 quick shots (I often do this if shooting a slower shutter speed, as 1 of them is bound to be sharp enough). It is a kind of cliche shot but I enjoy it.

Processing

All editing was done in Lightroom. I cropped the image to a 16:9 ratio (I do enjoy 16:9), adjusted the levels a tiny bit, made it black and white, then increased the contrast quite heavily.

Australia Day Sunrise

Happy Australia Day to all the Australians :)

This shot is from a few moments before sunrise yesterday morning (Australia Day, 26th Jan 2010) from the Mt Cootha Lookout in Brisbane. The Brisbane CBD and surrounding suburbs are visible in the shot.

The shot was taken using my Pentax K200D, Pentax DA 18-55 AL II, Slik 500DX Pro tripod and Kenko CPL filter. It is a HDR shot blended from 5 images, taken at -4, -2, 0, +2, +4 EV steps using Photomatix 3.1 and Tone Mapped using the Details Enhancer. I outline how I did this below.

Shots used were all at 18mm, ISO 100 and f13. Shutter speeds were 1/20sec, 1/80sec, 1/5sec, 0.8sec, 3.0sec

Shooting and Processing as follows:

  1. Shot in Pentax RAW (PEF)
  2. Set Exposure Compensation to -2.0 EV
  3. Shot 3 bracketed shots at +/- 2.0 EV (giving -4, -2 and 0 EV shots)
  4. Set Exposure Compensation to +2.0 EV
  5. Shot 3 bracketed shots at +/- 2.0 EV (giving +4, +2 and 0 EV shots)
  6. Imported into Lightroom 2.5
  7. Applied the settings shown below to all 6 images (the first image)
  8. Exported all 6 images to full quality JPG
  9. Deleted the worst of the 2 0 EV shots (this is only 5 images remember!)
  10. Blended the remaining 5 images in Photomatix
  11. Tone Mapped in Details Enhancer using the settings show below
  12. Saved as JPG
  13. Imported HDR JPG into Lightroom 2.5
  14. Applied the settings shown below in Lightroom (last image)
  15. Exported to JPG for Web

A Broken Christmas


A Broken Christmas
Originally uploaded by jezza323

I took this shot to enter in my workplace monthly photo comp in Decemeber. The theme for the month was “Broken”. Being Christmas time I got into the spirit and broke some tree decorations.

I was trying to capture a decoration in the process of breaking, but unfortunately my timing was never quite good enough. This was the best of the lot though, which I took just after it had broken.

There was a LOT of work in Lightroom 2.5 to complete this photo. The key to doing large area Adjustment Brush work like I did in this photo is to use a LARGE brush, and the Auto Mask feature. Don’t be too tempted to use a small brush to get in between things. If you keep the centre of the brush in the right spot, the Auto Masking will take care of the rest!


A before/after comparison in Lightroom

Shooting and PP Details as follows:

  • White Nylon backdrop
  • Pentax K200D body, firing onboard flash
  • Pentax SMC “A” 50mm f1.7 lens @ f22
  • Tripod to mount the camera, and a cable remote to fire it
  • Sunpak flash with optical trigger and home made diffuser, placed directly above, and slightly behind the subject
  • Shot in Pentax RAW (PEF)
  • Import into Lightroom 2.5
  • Applied large area of adjustment brush to make background more white, area and settings shown below
  • Minor basic edits to improve contrast and colour in the broken pieces, shown below
  • Edit Detail settings
  • Export to JPG For Web

Project 52 – #2 – Kurilpa Bridge


Kurilpa Pedestrian Bridge, originally uploaded by jezza323.

Buy art

This is the 2nd shot for my 2010 Project 52 – “Brisbane Landmarks”

This is the recently completed Kurilpa Bridge, a Pedestrian Bridge from the Brisbane CBD over the Brisbane River to West End/Southbank.

This is a 3 shot HDR, taken with my Pentax K200D and Pentax SMC DA 18-55mm AL II

Base shot was 18mm, ISO 100, f9.0, 5 sec, bracketing was at +/- 2.0 EV

UPDATE – Processing details now posted – sorry for the delay.

Shot and Processed as follows:-

  • Shot in Pentax RAW (PEF)
  • Imported into Lightroom 2.5
  • Exported to 16-bit TIFF
  • HDR Generated using Photomatix
  • Tone Mapped using Details Enhancer (settings shown below)
  • Save-as 16-bit TIFF
  • Import into Lightroom 2.5
  • Minor editing applied using adjustment brush to remove some unwanted detail on the right of image (brush positioning and settings shown below)
  • Increased Blacks and Brightness
  • Exported to JPG for Web


Summer Storm vs Shutter Speed

We just had a lunchtime summer storm roll through Brisbane, so while it was raining I took some shots of a tree near my house with the rain coming down on it. I thought it would be interesting to see the difference in the image of the rain with some different shutter speeds.

I setup my Pentax K200D on my tripod, mounted the Tair-11a 135mm f2.8 lens to get in close to some of the rain, and to keep the background blurred I set the aperture to f2.8. I set the camera to Aperture Priority mode (Av) to let it meter itself. The ISO was set to 400. This was the achieve a nice short shutter speed, and the resulting exposure was 1/640 sec and is shown below.

The following exposure I set the ISO to 100, and added a TianYa ND8 Cokin P sized filter in front of the lens (just held it by hand). This was to achieve a much longer exposure, and we end up with a 1/30 sec shutter speed and is shown below.

Take note of the difference in the rain drops. The first shot freezes the drops in mid air, while in the 2nd shot you get a long streak of falling water droplets. I personally prefer the first image, it conveys a sense of action to me that the 2nd image does not.

Processing on the first image was as follows :-

  • Shot in Pentax RAW (PEF)
  • Import into Lightroom 2.5
  • Processed as shown below (settings not show have not been altered)
  • Export to JPEG for Web

IR72 Filter exposure issues

Along with my cheap ND400 I bought a cheap IR72 filter, again just to play with the effect more so than anything else. Again the filter is for my DA 18-55 AL II lens which I would like to replace in the future.

As some people may know, DSLRs have a filter in front of the sensor which blocks most of the IR wavelengths of light at upto 95% effectiveness. This means that when you go and place a filter in front which blocks all visible light below 720nm (like an IR72 filter) your required shutter speeds get VERY long.

Upon receiving my filter I went about taking some shots at ISO1600, 0.5sec, f4.5 handheld (got to love that Pentax Shake Reduction). What I found was that the images just came out like I had a red filter in front, not very IR at all. Today I finally got my tripod out and did some testing, I found to get a proper IR like image I needed to shoot at around ISO400, 30sec, f11 in broad daylight. The effect that you want from an IR filter is tree leaves and grass coming out white, while everything else is more like a black and white image (probably with a very red cast to it from the camera though!)

So here are some key points for shooting IR with a modern DSLR which has the sensor IR block filter still in place.

  1. Shoot RAW – you will need to play with the white balance quite a lot to get a decent image. RAW also allows some give in exposure which means you dont have to get it exact (I am finding it hard to find the sweet spot).
  2. Shoot in Manual mode – you will need to play with aperture, ISO and shutter speed to get a good exposure. The camera won’t really know whats going on.
  3. Go for LONG exposures – If the shots are not coming out how you expect (looking for grass and trees to have white leaves) don’t be afraid to up the exposure some more, and then some more again! Remember I needed to go to 30 secs at ISO 400 to get the proper effect with my camera. Different cameras will have different filters on the sensors though, so play with your camera to find out what works for you.
  4. Check your focus – AF should still work fine, however, it may shift slightly from what is the correct focus distance (due to light wavelengths). So make sure you check that the things you want in focus are actually in focus.