Tag Archives: review

Canon ELPH 300 HS (Ixus 220 HS)

Done Deal

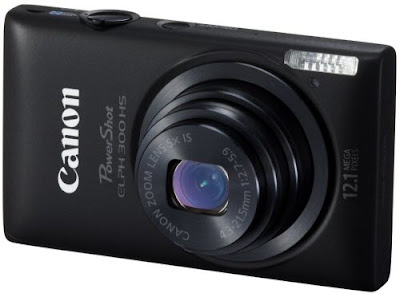
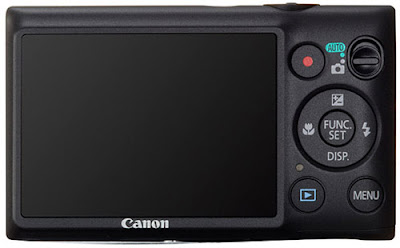
As mentioned previously, I was looking for a new Point & Shoot camera and had thought the Canon Powershot ELPH 300 HS (also known as the IXUS 220 HS) fit my requirements. Yesterday afternoon I went down to Henry’s Camera store in downtown Toronto and purchased one. Mainly this will be my wife’s camera, but I intend to make use of it when I want to try shooting some more timelapse’s with CHDK or when carrying my SLR around proves to be a problem.
Why the ELPH 300?

The main reasons I chose this camera over others are:

  • 24mm equivalent lens (wider than most point and shoot cameras)
  • A new CMOS sensor for low light performance (this model was only released in March 2011 so its nice new sensor technology)
  • HD video; 1080p and 720p are available, as well as lower quality modes
  • Size, it is a very small camera
  • It is a Canon, which means it can run CHDK (eventually)
What Is CHDK?

CHDK stands for Canon Hack Development Kit, and it allows you to unlock many features on most Canon Point and Shoot cameras. It works by placing a custom version of the software which runs on your camera onto your memory card, which is then loaded by the camera on startup. The custom software allows you do all sorts of things you couldn’t otherwise do on the camera, such as save images in RAW format, full manual exposure controls, in camera HDR and my favourite which is running scripts. A great benefit of CHDK is that the software is loaded on startup from the memory card which means there is no need to modify the software which exists on the camera. Modifying on camera software (the camera’s firmware) can be a risky process which can result in a bricked (unusable) camera. With the method CHDK uses you can simply flick the write protect switch on your SD card or swap to another SD card and be back up and running with the standard software immediately!

So What is the Point

Why would you want these extra features? These are my favourite features, a full list of features can be found on CHDK Wiki.

RAW Format

RAW mode allows you to get more data from the camera’s sensor into your image. JPEG is a lossy format, which means not all of the information the camera gets from its sensor ends up in your image file. Usually this doesn’t cause any problems, but if you want push the processing of an image to the extremes then RAW format will allow you to access extra information, usually in the form of more bits/pixel than the JPG format allows. RAW files are also larger than JPG files, so make sure you have plenty of memory available.

HDR

In camera HDR is another great benefit of using CHDK. It can be setup so a single shutter press will capture various exposures and automatically blend them all into 1 file, allowing greater dynamic range in your photograph. It is like taking 3 exposure bracketed shots on your SLR and processing them in Photomatix all with the press of the shutter button!

Manual Controls

CHDK’s extensive menu system allows you to change pretty much any setting in the camera, even those you would not normally have access to. For example, you are able to adjust the camera’s focus setting. This gives you the ability to focus manually, or even ask the camera to calculate the Hyper Focal distance for your current focal length and set the focus to that. There are so many settings you can adjust that I couldn’t possibly mention them all here.

Scripts

The scripting feature of CHDK is definitely my favourite. The script feature allows you to load a small file onto your memory card which can automate various tasks on the camera. The main use I have for this is a timelapse script. A timelapse script, once started, will automatically take images at a predefined interval, giving you the images you need to generate a timelapse video. Another script I have looked at briefly is the motion capture script which takes a photo anytime something moves, it is reported to be fast enough to capture lightning! Again these 2 scripts are just some examples of the many scripts you can run on the camera. You can write your own or see what you can find on the internet.

CHDK on the ELPH300 HS (Ixus 220 HS)

The Canon ELPH 300 HS is a new model released in March 2011, this means at the point of writing this post an official CHDK release for the camera does not yet exist. The CHDK software needs to be rewritten to suit each camera model released, and because this is done by volunteers in their own time it can take a little while. To see the current state of CHDK on the new Canon ELPH 300 HS camera you can visit the ELPH 300 page on the CHDK Wiki. If the information on this page is not detailed enough you can have a look on the CHDK forums to see how the porting process is progressing. A quick search for “Elph 300″ should turn up any progress reports.

At this stage there has only been 1 attempt to port the software which was abandoned soon after it began. In time I expect to see the software successfully running on the ELPH 300. Be patient.

Update (21/06/2011): A member of the CHDK forum has picked up the porting process where the previous attempt left off, good luck!

Update (12/08/2011): Unfortunately there has been no action on the development forum for a while now, hopefully some more people are buying the camera and we will see some progress soon.

Update (26/11/2011): First build of CHDK for the ELPH 300 HS/Ixus 220 HS is now available for testing! See the thread here on the CHDK forum for details,

Where is the Review!

I will be posting a review on this camera when I have really tested it out, so keep an eye out here or subscribe to my feed to make sure you don’t miss out.
Tair-11a Lens Review

Its about time I went and wrote a proper review for this lens, it is 1 of my favourite lenses to get out and use. I have been a bit slack in the getting out and using it department of late though.

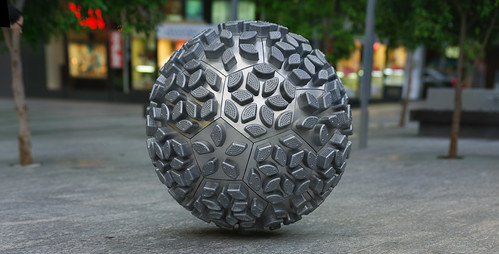
Brenizer Ball
Sculpture shot using the Brenizer Method

The Specs

So the lens, the Tair-11a lens is a 135mm f2.8 – f22.0 aperture prime lens, available in M42 mount (this is the mount you will want if you would like to use it on a DSLR – you can get an M42 adapter for all the major DSLRs). The lens uses the older preset style of aperture control (which is completely manual of course) which is located at the front of the lens, instead of the rear of the lens like a more modern lens. The lens is manual focus, and the focus on my copy is VERY smooth, a real pleasure to use, however different copies will vary with amount of use. Things wear out over time people! It has a small built in sliding hood, but a longer screw in hood would probably help prevent flare and increase contrast a little. The minimum focus distance is a fairly long 1.2m, so you wont be doing any macro work, but as a portrait lens, it works beautifully. There are some more detailed specs on the Zenit website, including this great cut away image of the lens.

The Feel

It is a big heavy lens, feels good in the hand, but you will want to chuck a battery grip on your DSLR if you have one. With the battery grip on the body the lens/body combo is much more balanced, without the battery grip the whole lot wants to tip forwards out of your hand a little, and holding it can become a chore after a while. The metal body has some nice solid grooves machined into it, which make it very easy to hold and focus with.

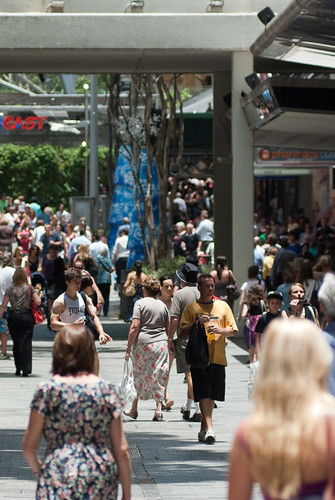
Queen St Mall Brisbane
Shot showing the colours from the Tair-11a lens

In Use

At 135mm focal length this lens is a 200mm equivalent FOV on a 1.5x crop body (such as my Pentax) so its not something you will want to be using if you are right up close to the action. The lens is ultra sharp, even the pixel peepers will be happy with this one (provided you nail the focus of course ;-) ). The colours are that lovely old single coated type, kind of similar to an old colour film shot (I’m a fan as you can tell). The single coating does however mean it is very prone to lens flare, so always be careful shooting towards a light source and use a hood (as I mentioned a little earlier) if possible. The real winner for this lens, is the bokeh. The Tair-11a boasts 20 aperture blades, giving a nearly perfectly round aperture at all openings, you can get some really great out of focus blur in your shots, and when you are shooting 135mm at f2.8, the DOF can get quite narrow, so there will be plenty of out of focus stuff to see. You can see the rest of my Tair-11a shots here on the blog.

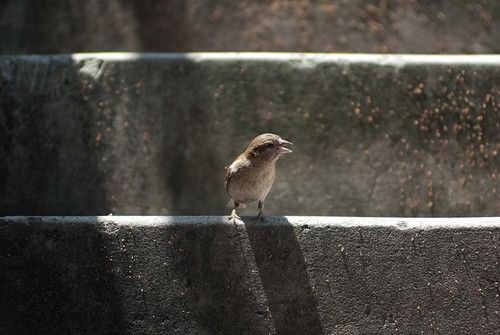
Bird on Stairs
Bird and Stair

Jupiter 9 Review – 85mm f2.0

I received my Jupiter-9 lens in the mail about 1.5 weeks ago, and I finally had a chance to use it yesterday. The Jupiter-9 is a lens made in Russia, available in various mounts (mine is M42, easy to use on most DSLRs), its 85mm focal length, and wide aperture of f2.0 make it a fine lens for portrait photography.

It seems to be selling for around $120USD or so (plus shipping) on Ebay these days. I paid about $140AU total for mine, as I wanted a good condition example, and this particular example included the plastic hard case, both caps, and a lens in reportedly excellent condition. I was not disappointed when it arrived, the condition was like new. For anyone interested the seller was petersburg_deals. Shipment was quite quick considering it was from Russia.

Down to the lens itself. I find it to be very sharp, but I have only tested at f2.8 and f4.0 so far. Most reviews say the lens is a little soft at f2.0, but the kind of softness that works great in portrait photography. I find the colours to be great, let me know what you think. Here are the first lot of test shots. You can check out all the other photos I’ve taken with this lens in my Jupiter-9 Flickr Set

Very first shot with the lens mounted on my K200D. A friends free promotional mug at work. This is at f2.0, but doesn’t give a good indication of sharpness.

This is an f2.8 test shot, unfortunately the light was very uneven, but you can see the lens is sharp.

This is a 100% crop from the previous image, showing how sharp the image is. No post processing sharpening has been applied (click the image to view at original size).

Bird and Stair Testing the Tair-11a


Bird and Stair Testing the Tair-11a  

Originally uploaded by jezza323

I have already used this one in my Tair-11a review, but I just have to share again. This shot really works for me.

Taken with the Tair-11a at f2.8 (wide open), ISO 100, 1/640.

Post Processing as follows:-

  • Shot in Pentax RAW (PEF)
  • Imported in Lightroom 2.5
  • Exported to JPG for Web

No editing at all!

If you like this shot, have a read of my Tair-11a Lens Review or have a look at my other Tair-11a shots

Autopano Pro and Giga

Following on from my previous posts about panoramas, and the Brenizer narrow DOF panorama technique. I am briefly going to give Autopano’s panorama stitching software a plug, and explain how I use it. Autopano is one of the best panorama stitching applications around. I never have had any problems with it (that weren’t fixed by an update shortly later!) when stitching panoramas, even those as large as 100 shots.

I use Autopano Giga 2, although I really only use the features in Autopano Pro. My usual workflow for a panorama is as follows :-

  • Shoot in Pentax RAW, Manual mode but Auto White Balance
  • Import into Lightroom 2.5
  • Set a custom white balance on 1 image from the panorama
  • Select all images in panorama and sync the white balance to the value I chose.
  • Export all images in the panorama to a new subfolder (eg. Pano-1) as 16 bit TIFF
  • Open the new subfolder in an explorer window
  • Open Autopano
  • Create a new group in Autopano
  • Select all the files in the subfolder in the explorer window, and drag and drop onto the new group in Autopano
  • Edit the settings on the group in Autopano. Set the project folder to the subfolder location. Turn off Auto colour correction, sometimes I will increase the number of control points if there are few features in the images.
  • Click the Detect button in Autpano, it will then stitch the images and render a small preview.
  • Click the Render button in Autopano next to the preview. It will show a dialog with the render options. I render to a 16 bit TIFF with ZIP compression, and I change the output folder to be 1 above the subfolder (the same folder as the original import from camera). Also don’t forget to check the output size, if the panorama is not going to be printed extremely large, scale down the render, it will save a lot of time! And finally I change the filename to match the subfolder name, eg Pano-1.tif.
  • Once rendering is complete, I return to Lightroom, library and synchronize the import folder, select Import new files, show import dialog before importing.
  • Then I deselect the All option and only select the base import folder where I saved the panorama to.
  • My Pano-1.tif file should now be present along with the original panorama frames in the library, I can edit it as I please (crop, curves, colours etc)
  • And the final step is to export to JPG for publishing and also to DNG for archiving purposes.

Well that workflow took a more to write down than I expected. I hope it helps you out next time you are doing a panorama!

Tair-11A 135mm f2.8

As I mentioned in an earlier post. I bought a Tair-11A M42 mount lens on Ebay. I have seen great shots from this lens on flickr, and read plenty of great reports on it. This lens is 135mm prime, aperture is a preset adjustment and ranges from f2.8 to f22. It focuses from 1.2m to infinity and has a small built in hood.

It truely is an amazing lens. Incredibly sharp, very smooth bokeh (out of focus highlights) and is a joy to use with a lovely smooth focusing ring. Here are some shots I’ve taken with it since it arrived.

First a bokeh test
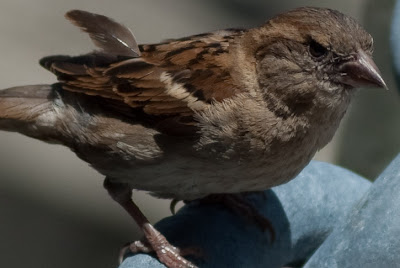
Then this little bird came along
And to prove how sharp this lens is – this is a 100% crop of the bird from another shot
And a technique tester shot. A panorama to get the narrow DOF effect. I’ll explain this technique in a later post

Cheap ND400 filters Pt 2

Here we go, finally have a shot I can post from my cheap Ebay ND400 filter.

This shot was very underexposed. I allowed for about 9.5 stops of extra exposure (I use the PhotoBuddy app for the iPhone to work out exposures) but I would say this particular filter needs more like 11-12 stops extra. A Hoya ND400 filter is specified as a 9 stop filter. This shot has +4 stops of exposure in PP (Lightroom) and the colour cast is mostly corrected (but not totally) by adjusting the white balance. Here are the settings from lightroom and the shot. Its nothing special but it does display the problems with the colour, and obviously incorrect number of light stops filtered. As you can see I am at the limit of adjustment for white balance, but the photo still shows a slight purple cast. This means you will not get true colours from this filter.

Russian lenses

I believe I may have a problem… I thought I had enough lenses for a while, until I saw a Helios 44-2 M42 lens (58mm f2.0) for a tiny $15, I did a quick search of Flickr and liked the look of the images from it. I bought it and its a great lens, not just great value for $15, but just a generally great lens! This lens led me into researching Russian lenses in general. I then was able to get a Mir-1 (37mm f2.8) M42 from the PentaxForums trading section from an Australian member, it included the lens, original hard plastic case and instruction in russian. I just recently replaced my Hanimar 135mm lens with a Russian Tair-11A 135mm f2.8 M42, and hope to add add the very popular Jupiter 9 (85mm f2.0) M42 lens to my collection. If you don’t know much about these well regarded (and quite cheap) Russian made lenses, I suggest you look into them.

Cheap ND400 filters

I recently bought a cheap (very cheap) ND400 filter on Ebay for my DA 18-55 AL II lens. I picked the cheap option because I just wanted to play with the effect, but didnt want to spend lots on a filter for a lens I hope to replace soon.

Anyway, back to the point. Colour cast. This is where the quality difference really becomes apparent. The cheap filter produces a very pronounced purple cast. I havent tried to process any of the images yet, it is possible that setting the white balance can overcome the colour cast, but it should not be necessary.

Just another case of getting what you paid for I suppose! I will post some samples of pre and post processing soon.

UPDATE: Shots and details now available.