Tag Archives: street photo tips

Heading Down The Mall


Candid Panning
Originally uploaded by jezza323

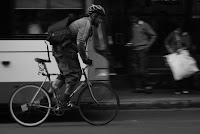
A panning shot of a speedy walker ;-) Took the DSLR out for some street shots yesterday instead of the little Canon. IQ difference is really something else, lol
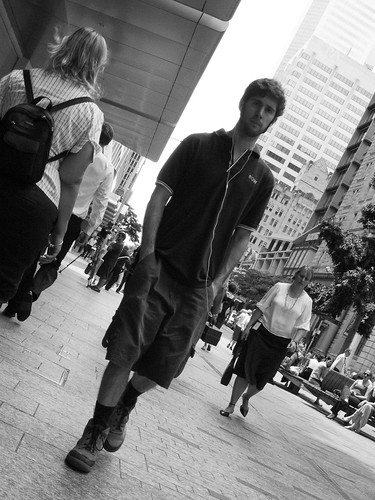
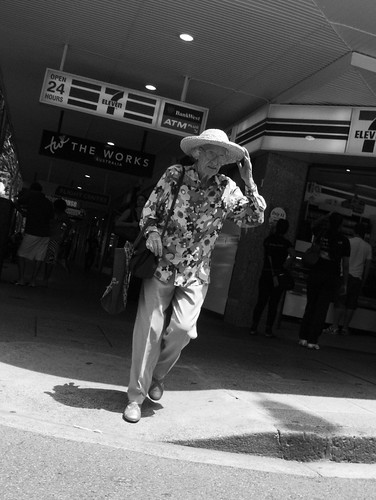
Canon is super grainy at ISO 200, this shot at ISO 800 is way better.

Taken with the Pentax K200D and Pentax M 28mm f2.8 at f11, using zone focus method for focusing.

Trudging


Trudging
Originally uploaded by jezza323

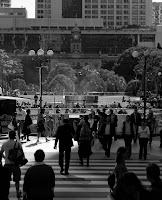
Another street shot from yesterday, taken from the hip with the Canon Powershot A590 IS running CHDK, shot in RAW. Was taken at 5.8mm (35mm @ 35mm equivalent), ISO 200, f3.5, 1/500″.

I have discovered that the Manual Focus option gets reset as soon as the display goes blank on this camera, will try to work that out…

Today I think I will take the DSLR out for some street shots, provided the rain holds off. I will take the 28mm prime, set to hyperfocal and see what I can come up with.

Processing was the same as the shot I posted last night – Hold On To Your Hat

Hold On To Your Hat


Hold On To Your Hat
Originally uploaded by jezza323

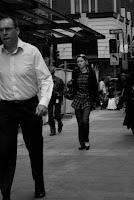
Another from the hip street shot with the Canon Powershot A590 IS point and shoot. This one was taken at 5.8mm (35mm @ 35mm equivalent), ISO 200, f3.5, 1/800″

Went for a walk down to the Queen St Mall at lunchtime to get some shots, this is one I got on the way. Managed to get a couple of others were decent too.

I even managed to get EXIF on this one! Processed as follows:

  • Copied RAWs + JPGs off camera
  • Converted to DNG with DNG for Powershot 2
  • Imported DNGs to Lightroom 2.5
  • Edited in Lightroom 2.5 (contrast, exposure, noise reduction, greyscale)
  • Exported to JPG for Web

Back to Work With You & Some Tips


Back to Work With You
Originally uploaded by jezza323

Here is the first of a few upcoming street shots taken with the Canon Powershot A590 IS point and shoot digital, running the CHDK software. I am going to try and get my confidence up shooting street with this little camera, before I try getting out with the wider lenses using the DSLR.

I shot this from the hip, using hyperfocal distance and Av (aperture priority mode). The shot lost its EXIF in the RAW conversion (CHDK generates unsupported RAW files) but was taken at 5.8mm (35mm @ 35mm equivalent), ISO 125, f6.3 and 1/60″

By the way, if you want a great read on street photography, check out this fantastic post by “Street Vision”, an LA street photographer.

Tips and Tricks From The Web – Street Photography Part 5

I haven’t been out shooting any street over the last little while, so instead of giving you my tips and tricks, I will share some I have found on the web. Hopefully they will help me out, and you too.

Street Photography Series

  1. Previous Attempts
  2. Zone Focusing
  3. Hyperfocal Distance
  4. Progress?
  5. Tips and Tricks from the Web

19 Killer Street Photography Tips

The first site with some notable tips I have found is this one. From ILovePhotoBlogs.com. Here are the points that stood out to me.

What is the best lens for street photography?
“I personally like to use a wide lens (24mm, 28mm, 35mm on full frame 35mm) to be pretty close to my subject and get that intimate look of my photos. It took me a while to get closer, so I’d suggest to start with maybe a 75mm or 50mm lens to keep some distance and get closer from there…”

Lens choice is an important technical aspect to street photography, and this tip is something I have seen mentioned more than once (many times in fact).

What are the best places to shoot street photography?
“At a fair, a midway at a carnival, a sports event, parade, concert or public ceremony, people’s need for personal space and therefore privacy is reduced. The level of sensory stimulation is also usually high at these events, which tends to reduce the need for space. As well, in most of these situations people are having fun so they are more relaxed.”

Choosing somewhere to take street shots is important. You won’t get yourself out the door if you don’t have somewhere to go in mind.

10 Quick Street Photography Tips

This 2nd link is from a Canon Powershot S90 Street Photography Challenge website. It is just 10 short tips on how to get some street shots. I don’t necessarily agree with them all by the way. These are the tips that hit home when I read it.

3. PRE-FRAME. PRE-FOCUS.
Frame the scene, preset your focus and wait patiently for the right elements to fall into place, before you click. You’ll be surprised at the results of this simple technique.

This is another technique I have seen mentioned a few times. I have tried this out once or twice. If you see a great background or scene, and can imagine a person with a certain look would work well there, then frame up, and wait patiently for someone matching your idea to come by, or you might find someone with a different look that works while you are waiting.

5. SHOOT FROM THE HIP.Learn to frame your images without looking through the viewfinder or at the LCD. Shoot with the camera away from your face – from the hip or low at your chest work well. Low angle shooting also gives an interesting perspective.

Another way to get that candid shot. Most of the street photographers I follow have used this method from time to time. It is worth while learning to aim your camera without looking through the view finder. I am notoriously bad at this myself, but it is something I am working on.

6. OBSERVE. OBSERVE. OBSERVE.Keep your eyes open and be aware of your surroundings. Observe everyone and everything around you. You’ll be surprised at how much is going on in front of you, and how much you can anticipate – ready for that next perfect shot.
7. BE PATIENT.Street photography is a test of patience. Either waiting for the scene to evolve or just capturing the right shot, a great photograph takes time to realize. Don’t rush that special moment before clicking.

I believe these 2 tips go hand in hand. You must observe whats going on around you, and you must be patient. A good shot won’t come by every 10-15 seconds. Wait for it to make itself available, be prepared, anticipate it, and shoot it.

Street Photography Tips

This is the final link for todays post. There are some really great street shots posted in this forum post, along with some interesting tips.

readiness
learn your camera’s controls, shoot in a way that let’s you shoot quickly! i’m always pre-set for the most part (choice of iso, aperture) and i typically shoot in aperture priority mode. i also learn the hyperfocal distances of my lenses, so that i can shoot comfortable within a distance range. watch the lighting, which can change by 8 or 9 stops just by turning a corner! it’s really important to have all your senses focused on the job at hand

You must be able to react quickly, part of that is knowing that your equipment is ready, the other part is being ready to react yourself.

confidence
street shooting requires confidence.. *you* are doing nothing wrong, so don’t sneak around! put away that tele, and stick a fifty or thirty-five on your dslr, or set your digicam’s zoom to the wider end of things, and see the scene “normally,” up close and personaly. this may be strange for some of you, but i assure you it gets easier after your initial trepidation wears off. the worst that can happen is people say “no, i don’t want my photo taken,” and so you smile and move on! the wider angles offer so much more to the viewer imo, that they’re worth the extra effort in becoming more comfortable …

The final tip of the day is this one. BE CONFIDENT! This is something I definately suffer from myself, I am shy by nature, so being out in the middle of a group of strangers pointing my camera at them is not comfortable for me, but, I do get out there, and I do try it. The more you do it, the more confident you will get.

If you have any good tips please share them with me, ill make sure they get posted up. Best of luck with your street shooting

Hyperfocal Distance – Street Photography Part 3

Street Photography Series

  1. Previous Attempts
  2. Zone Focusing
  3. Hyperfocal Distance
  4. Progress?
  5. Tips and Tricks from the Web

Hyperfocal Distance

The hyperfocal distance is the focus point for any given focal length and aperture combination which gives the largest possible depth of field. Basically zone focus with the biggest possible zone.


How to Find It

Hyperfocal distance can be calculated using an online calculator, or an application such as Photobuddy. Another option (I did this before I got Photobuddy) is to write them down, because the only variables are focal length and aperture you can write down the hyperfocal distance for the most common focal lengths you will use, and each aperture. For example, if I am going shooting with my Pentax M 28mm lens, I know the focal length will be 28mm, and I know I won’t be shooting wide apertures without focusing on the subject itself. So what I can do is calculate and write down the hyperfocal distance at f5.6, f8.0, f11.0 and f16.0 as a small reference. The other option you have is to use the DOF scale on your lens (if it has one). This link has a good picture to show how to use the scale to set to hyperfocal distance.

Here is my example hyperfocal chart for a K200D with a 28mm lens (you probably dont actually need near limit written down, but it can be helpful – it is always half of the hyperfocal distance)

  • f5.6 – 6.96m – near limit 3.48m
  • f8.0 – 4.93m – near limit 2.465m
  • f11.0 – 3.49m – near limit 1.745m
  • f16.0 – 2.48m – near limit 1.24m

Applying Hyperfocal To Street Photography

To apply this method of focusing to your street photography is much like zone focusing. When you calculate your hyperfocal distance, you will know the near limit of acceptable focus. Once you know this, and can judge that distance, you can photograph anything which is at least that far away from you without having to focus on it. All you need to do is set your lens/body to the appropriate f-stop, focal length, and focus distance then start taking shots.

I will post up my results with this technique in the few days. I am waiting for the temps to drop, its been over 30 degrees C here all week!

Zone Focusing – Street Photography Part 2

When shooting street photography it is often important to be able to fire off a shot without any delay or hesitation, from yourself, or your gear, to capture that moment of shown emotion or humor or who knows what.

Street Photography Series

  1. Previous Attempts
  2. Zone Focusing
  3. Hyperfocal Distance
  4. Progress?
  5. Tips and Tricks from the Web

Zone Focusing Overview

One of the techniques you can use to ensure there is no delay from your equipment is to pre-focus using the zone focusing technique. What this requires is a good estimation of distance ahead of time. The general idea is to set the focus to a given range (or zone) ahead of time, and shoot within this zone. This technique is very effective with older manual focus lenses but can also be used with autofocus lenses, set to manual focus mode.

How to Focus on a Zone – DOF Scale

Many (in fact all the ones I own) older lenses will have a handy DOF scale or guide built into the focus and aperture rings on the lens. This article has a fantastic shot and explanation of how the guide on your lens can help you. As I’ve said, you need to have a reasonably good judge of distance to use this method, but if you don’t, try it out, because you will soon learn to be able to judge the distances better.

Without a DOF Scale

If you are using a lens which does not have a handy DOF guide (most newer lenses do not) you can still use the zone focusing technique, however you will need to pre-calculate your DOF (use the online calculator here), or use an application such as Photobuddy to help you out (this is the what I do).

Does It Work

I have used this technique in the past with my 50mm lens. I set the aperture to f8.0, then focused to 8m on the focusing scale. This gives a DOF of 11m (5.3m to 16.3m) on my K200D (the sensor crop factor does play a factor here!). Then when shooting all you need to do is pick your subjects within that range.

Good luck with your Zone Focusing!

Tips and Attempts – Street Photography Part 1

I have decided to try to get better at shooting some street type stuff. I have done a little of it before, but not very successfully. So this will be the start of another series, this time all about street.

Street Photography Series

  1. Previous Attempts
  2. Zone Focusing
  3. Hyperfocal Distance
  4. Progress?
  5. Tips and Tricks from the Web

I sent Javier (who writes the Street Vision blog) a message the other day asking for some advice on focusing techniques. He suggested using hyperfocal distance and zone focusing, he also suggested I write an article on the subject, which I will when I have experience in using them. This has been a bit of a catalyst for me to try out street shooting again, and write about my experiences, successful and not. I will be posting a number of links in this series as I learn by reading others work, so be prepared for some clicking.

I will start the series with some of my previous attempts at street shooting. I believe most are pretty boring, but they are street shots none the less. Lets see if I can improve the shots as this series goes on!

If you are a street shooter, let me know your tips to include, if you want to share your own street shots, post those too!