Tag Archives: lightroom

Royal Ontario Museum

Royal Ontario Museum 

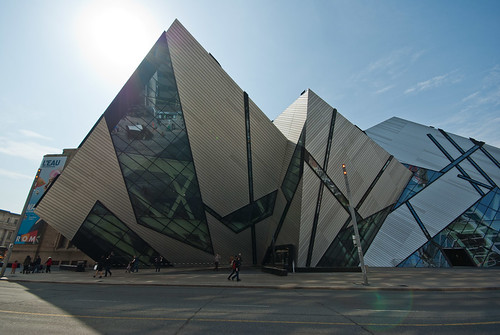
Royal Ontario Museum, originally uploaded by jezza323.

This is another of the main tourist attractions in Toronto. The ROM (Royal Ontario Museum) is quite large! We were expected a 2hr or so tour of the museum, however it turned into an all day trek through the place, we walked through for over 6 hours!

The museum is huge, and has a great collection of pieces and displays. I highly recommend a visit to anyone in the area.

This is a single exposure, with quite a bit of Lightroom tweaking to bring out the detail.

Rainy Day


Rainy Day
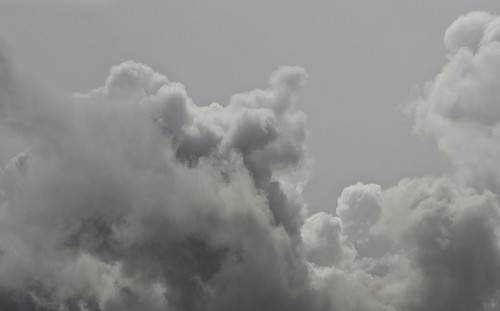
Originally uploaded by jezza323

Well its been raining since the beginning of the weekend here now (on and off raining anyway). Here is a shot I got of some rain clouds in between the showers. Unfortunately the background is a boring grey rather than white or blue sky (or even better more cloud formations)

This is a 3 shot panorama. I shot using the K200D and Jupiter-9 85mm lens with aperture set to f5.6. I made sure to shoot the frames quickly so the movement of the clouds wouldn’t interfere with the stitching.

Shooting and Processing as follows:

  1. Shot in Pentax RAW (PEF)
  2. Imported into Lightroom 2.5
  3. Exported to 3x 16 bit TIFF
  4. Stitched using Autopano Giga
  5. Rendered to a single 16 bit TIFF
  6. Imported new TIFF into Lightroom 2.5
  7. Applied adjustments in Lightroom (clarity, contrast, white balance)
  8. Exported to JPG for Web

The Desaturated Look


Untitled
Originally uploaded by jezza323

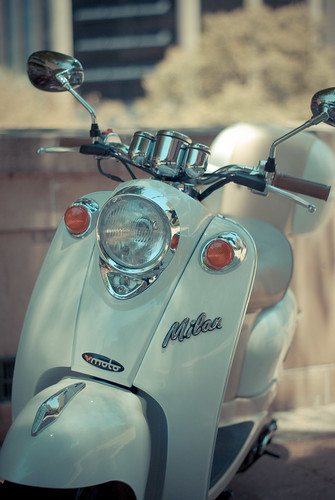
This is a shot I took during the week. I quite like this style of shot, so I thought I would share the preset I used.

The preset is called “PH Fashion Shoot II” and I found it at this site. I recommend downloading this set of presets (even if you don’t intend on using them) and just having a look at the settings they contain.

Enjoy!

A Broken Christmas


A Broken Christmas
Originally uploaded by jezza323

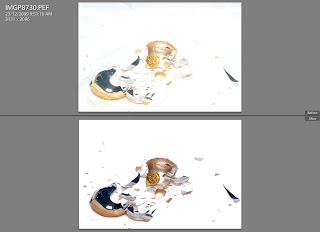
I took this shot to enter in my workplace monthly photo comp in Decemeber. The theme for the month was “Broken”. Being Christmas time I got into the spirit and broke some tree decorations.

I was trying to capture a decoration in the process of breaking, but unfortunately my timing was never quite good enough. This was the best of the lot though, which I took just after it had broken.

There was a LOT of work in Lightroom 2.5 to complete this photo. The key to doing large area Adjustment Brush work like I did in this photo is to use a LARGE brush, and the Auto Mask feature. Don’t be too tempted to use a small brush to get in between things. If you keep the centre of the brush in the right spot, the Auto Masking will take care of the rest!


A before/after comparison in Lightroom

Shooting and PP Details as follows:

  • White Nylon backdrop
  • Pentax K200D body, firing onboard flash
  • Pentax SMC “A” 50mm f1.7 lens @ f22
  • Tripod to mount the camera, and a cable remote to fire it
  • Sunpak flash with optical trigger and home made diffuser, placed directly above, and slightly behind the subject
  • Shot in Pentax RAW (PEF)
  • Import into Lightroom 2.5
  • Applied large area of adjustment brush to make background more white, area and settings shown below
  • Minor basic edits to improve contrast and colour in the broken pieces, shown below
  • Edit Detail settings
  • Export to JPG For Web

Project 52 – #2 – Kurilpa Bridge


Kurilpa Pedestrian Bridge, originally uploaded by jezza323.

Buy art

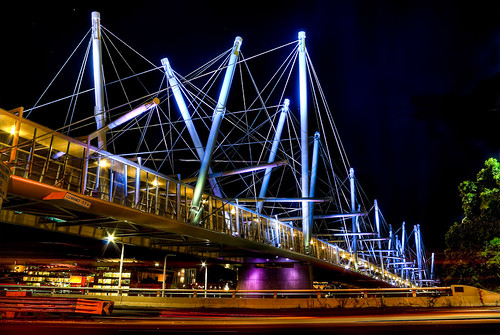
This is the 2nd shot for my 2010 Project 52 – “Brisbane Landmarks”

This is the recently completed Kurilpa Bridge, a Pedestrian Bridge from the Brisbane CBD over the Brisbane River to West End/Southbank.

This is a 3 shot HDR, taken with my Pentax K200D and Pentax SMC DA 18-55mm AL II

Base shot was 18mm, ISO 100, f9.0, 5 sec, bracketing was at +/- 2.0 EV

UPDATE – Processing details now posted – sorry for the delay.

Shot and Processed as follows:-

  • Shot in Pentax RAW (PEF)
  • Imported into Lightroom 2.5
  • Exported to 16-bit TIFF
  • HDR Generated using Photomatix
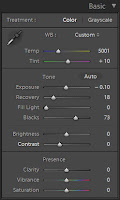
  • Tone Mapped using Details Enhancer (settings shown below)
  • Save-as 16-bit TIFF
  • Import into Lightroom 2.5
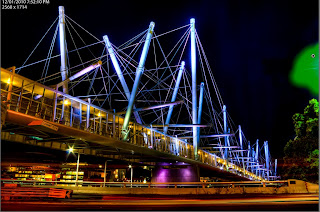
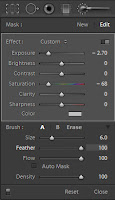
  • Minor editing applied using adjustment brush to remove some unwanted detail on the right of image (brush positioning and settings shown below)
  • Increased Blacks and Brightness
  • Exported to JPG for Web


Summer Storm vs Shutter Speed

We just had a lunchtime summer storm roll through Brisbane, so while it was raining I took some shots of a tree near my house with the rain coming down on it. I thought it would be interesting to see the difference in the image of the rain with some different shutter speeds.

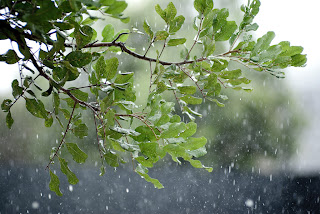
I setup my Pentax K200D on my tripod, mounted the Tair-11a 135mm f2.8 lens to get in close to some of the rain, and to keep the background blurred I set the aperture to f2.8. I set the camera to Aperture Priority mode (Av) to let it meter itself. The ISO was set to 400. This was the achieve a nice short shutter speed, and the resulting exposure was 1/640 sec and is shown below.

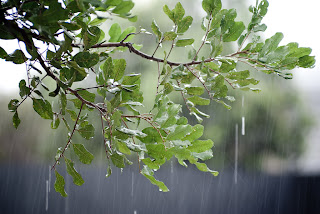
The following exposure I set the ISO to 100, and added a TianYa ND8 Cokin P sized filter in front of the lens (just held it by hand). This was to achieve a much longer exposure, and we end up with a 1/30 sec shutter speed and is shown below.

Take note of the difference in the rain drops. The first shot freezes the drops in mid air, while in the 2nd shot you get a long streak of falling water droplets. I personally prefer the first image, it conveys a sense of action to me that the 2nd image does not.

Processing on the first image was as follows :-

  • Shot in Pentax RAW (PEF)
  • Import into Lightroom 2.5
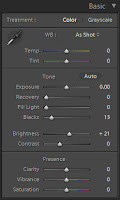
  • Processed as shown below (settings not show have not been altered)
  • Export to JPEG for Web
Flowering about your Resting Place

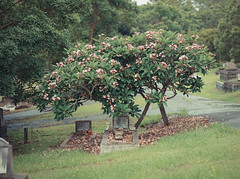
Another Brenizer shot I took today in the Toowong Cemetary in Brisbane. This one was also taken with the Tair-11a 135mm f2.8.

  • 42 shots taken with K200D, manual mode, ISO 100, f2.8, 1/640 sec, custom white balance, shot in JPEG (to save space)
  • Import into Lightroom 2.5
  • Stitched with Autopano Giga 2
  • Save as 16 bit TIFF
  • Import result into Lightroom 2.5
  • Edit as shown below
Lightroom Edits (click for larger)