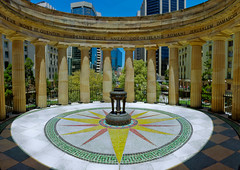
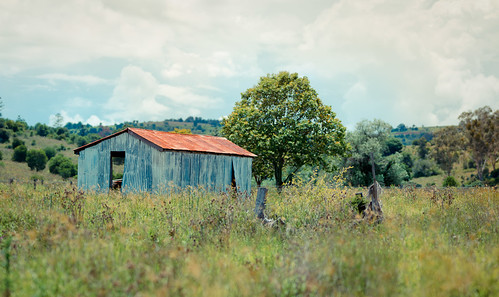
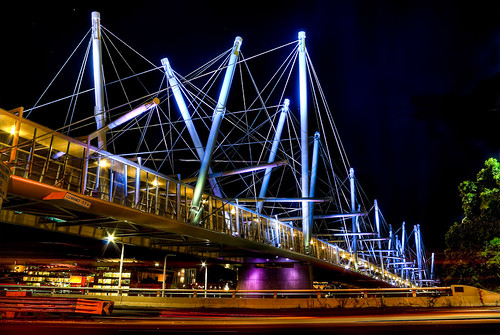
Happy Australia Day to all the Australians ![]()
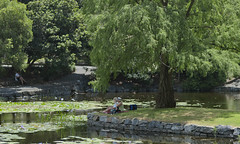
This shot is from a few moments before sunrise yesterday morning (Australia Day, 26th Jan 2010) from the Mt Cootha Lookout in Brisbane. The Brisbane CBD and surrounding suburbs are visible in the shot.
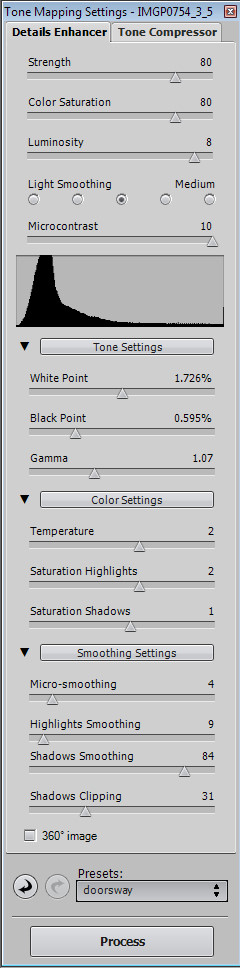
The shot was taken using my Pentax K200D, Pentax DA 18-55 AL II, Slik 500DX Pro tripod and Kenko CPL filter. It is a HDR shot blended from 5 images, taken at -4, -2, 0, +2, +4 EV steps using Photomatix 3.1 and Tone Mapped using the Details Enhancer. I outline how I did this below.
Shots used were all at 18mm, ISO 100 and f13. Shutter speeds were 1/20sec, 1/80sec, 1/5sec, 0.8sec, 3.0sec
Shooting and Processing as follows:
- Shot in Pentax RAW (PEF)
- Set Exposure Compensation to -2.0 EV
- Shot 3 bracketed shots at +/- 2.0 EV (giving -4, -2 and 0 EV shots)
- Set Exposure Compensation to +2.0 EV
- Shot 3 bracketed shots at +/- 2.0 EV (giving +4, +2 and 0 EV shots)
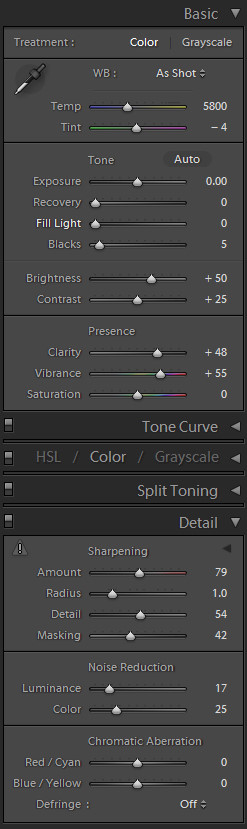
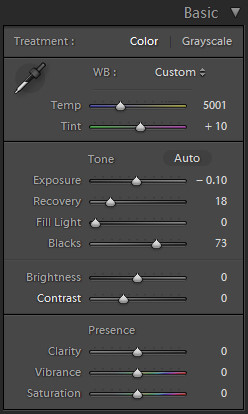
- Imported into Lightroom 2.5
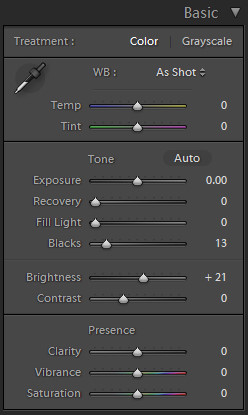
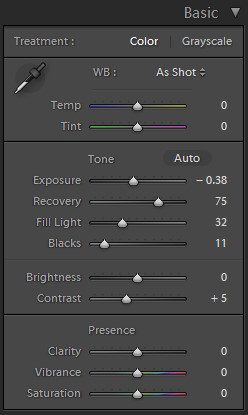
- Applied the settings shown below to all 6 images (the first image)
- Exported all 6 images to full quality JPG
- Deleted the worst of the 2 0 EV shots (this is only 5 images remember!)
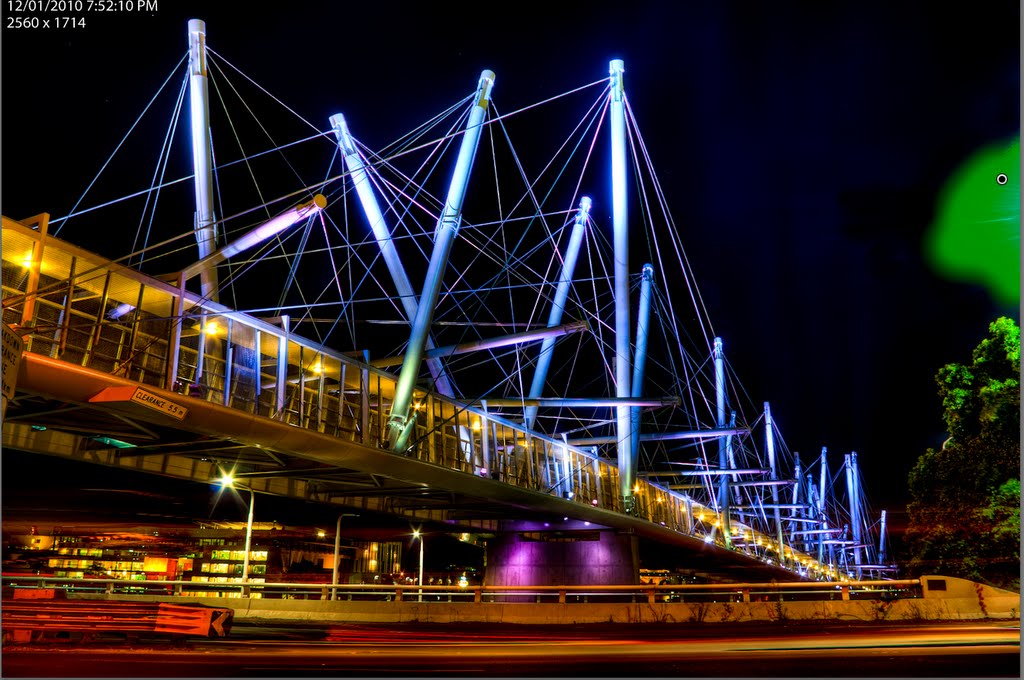
- Blended the remaining 5 images in Photomatix
- Tone Mapped in Details Enhancer using the settings show below
- Saved as JPG
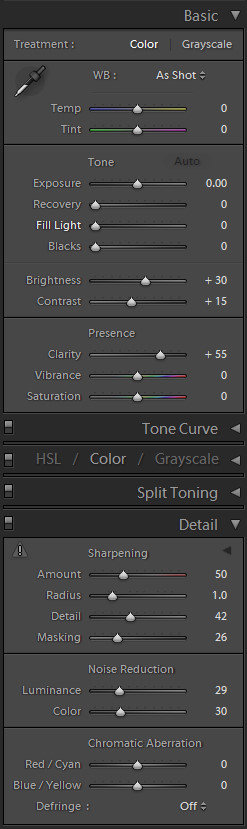
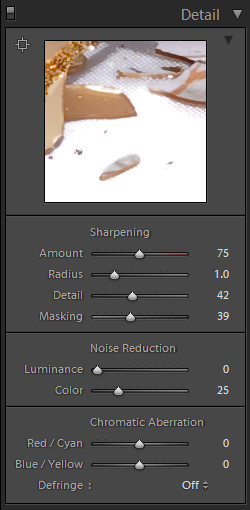
- Imported HDR JPG into Lightroom 2.5
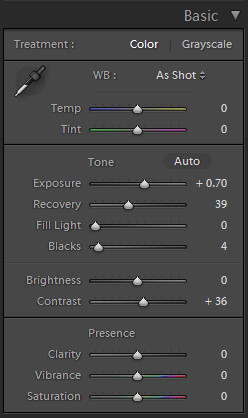
- Applied the settings shown below in Lightroom (last image)
- Exported to JPG for Web