Category Archives: Photos

Tair-11A 135mm f2.8

As I mentioned in an earlier post. I bought a Tair-11A M42 mount lens on Ebay. I have seen great shots from this lens on flickr, and read plenty of great reports on it. This lens is 135mm prime, aperture is a preset adjustment and ranges from f2.8 to f22. It focuses from 1.2m to infinity and has a small built in hood.

It truely is an amazing lens. Incredibly sharp, very smooth bokeh (out of focus highlights) and is a joy to use with a lovely smooth focusing ring. Here are some shots I’ve taken with it since it arrived.

First a bokeh test
Then this little bird came along
And to prove how sharp this lens is – this is a 100% crop of the bird from another shot
And a technique tester shot. A panorama to get the narrow DOF effect. I’ll explain this technique in a later post

A Late Christmas HDR


Christmas Lights At Dusk, originally uploaded by jezza323.

Buy art

Just thought I would share this shot I took on Tuesday 22nd December at King George Square in Brisbane’s CBD. This is a 3 shot HDR taken at +/- 2.0 EV steps, in Pentax RAW format (PEF). I took it using a my tripod, K200D and Pentax SMC DA 18-55mm AL II f3.5-5.6 lens with +2.0 EV bias (this means the shots is actually 0 EV +2 EV and +4 EV), no filters. I used the +2 starting EV to get more details from the christmas lights. The base shot settings were f13, 10 secs, ISO 100 in Av (Aperture priority) mode.

Processing was as follows

Lightroom 2.5

  • Import
  • Export all 3 files as 16-bit TIFF format

Photomatix

  • Generate HDR – settings shown below
  • Tone Mapped using Details Enhancer method – settings shown below
  • Save As 16-bit TIFF
Lightroom
  • Import
  • Crop (rotated slightly)
  • Export to JPG for Web

Cheap ND400 filters Pt 2

Here we go, finally have a shot I can post from my cheap Ebay ND400 filter.

This shot was very underexposed. I allowed for about 9.5 stops of extra exposure (I use the PhotoBuddy app for the iPhone to work out exposures) but I would say this particular filter needs more like 11-12 stops extra. A Hoya ND400 filter is specified as a 9 stop filter. This shot has +4 stops of exposure in PP (Lightroom) and the colour cast is mostly corrected (but not totally) by adjusting the white balance. Here are the settings from lightroom and the shot. Its nothing special but it does display the problems with the colour, and obviously incorrect number of light stops filtered. As you can see I am at the limit of adjustment for white balance, but the photo still shows a slight purple cast. This means you will not get true colours from this filter.

Russian lenses

I believe I may have a problem… I thought I had enough lenses for a while, until I saw a Helios 44-2 M42 lens (58mm f2.0) for a tiny $15, I did a quick search of Flickr and liked the look of the images from it. I bought it and its a great lens, not just great value for $15, but just a generally great lens! This lens led me into researching Russian lenses in general. I then was able to get a Mir-1 (37mm f2.8) M42 from the PentaxForums trading section from an Australian member, it included the lens, original hard plastic case and instruction in russian. I just recently replaced my Hanimar 135mm lens with a Russian Tair-11A 135mm f2.8 M42, and hope to add add the very popular Jupiter 9 (85mm f2.0) M42 lens to my collection. If you don’t know much about these well regarded (and quite cheap) Russian made lenses, I suggest you look into them.

IR72 Filter exposure issues

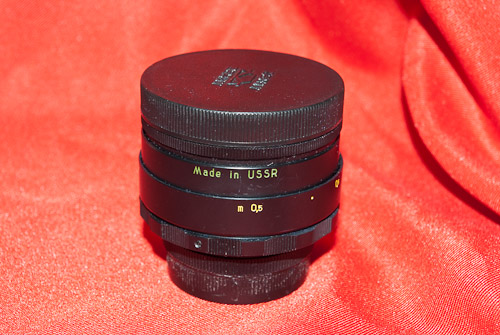
Along with my cheap ND400 I bought a cheap IR72 filter, again just to play with the effect more so than anything else. Again the filter is for my DA 18-55 AL II lens which I would like to replace in the future.

As some people may know, DSLRs have a filter in front of the sensor which blocks most of the IR wavelengths of light at upto 95% effectiveness. This means that when you go and place a filter in front which blocks all visible light below 720nm (like an IR72 filter) your required shutter speeds get VERY long.

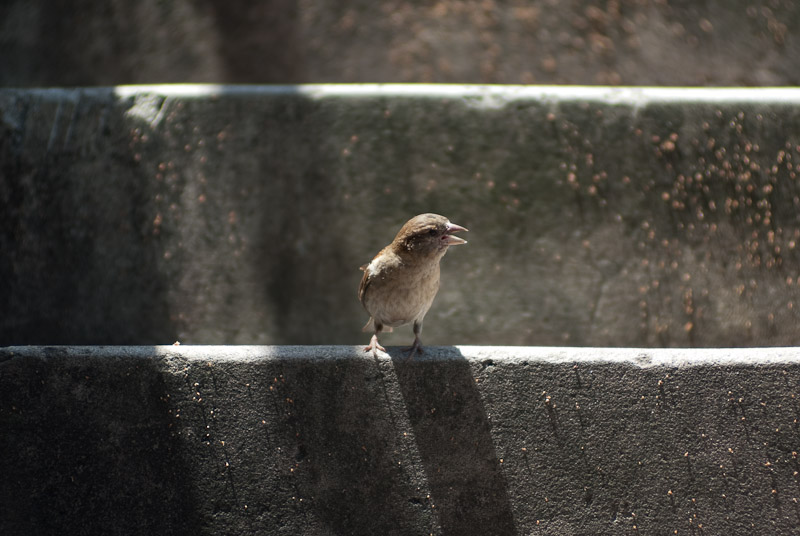
Upon receiving my filter I went about taking some shots at ISO1600, 0.5sec, f4.5 handheld (got to love that Pentax Shake Reduction). What I found was that the images just came out like I had a red filter in front, not very IR at all. Today I finally got my tripod out and did some testing, I found to get a proper IR like image I needed to shoot at around ISO400, 30sec, f11 in broad daylight. The effect that you want from an IR filter is tree leaves and grass coming out white, while everything else is more like a black and white image (probably with a very red cast to it from the camera though!)

So here are some key points for shooting IR with a modern DSLR which has the sensor IR block filter still in place.

  1. Shoot RAW – you will need to play with the white balance quite a lot to get a decent image. RAW also allows some give in exposure which means you dont have to get it exact (I am finding it hard to find the sweet spot).
  2. Shoot in Manual mode – you will need to play with aperture, ISO and shutter speed to get a good exposure. The camera won’t really know whats going on.
  3. Go for LONG exposures – If the shots are not coming out how you expect (looking for grass and trees to have white leaves) don’t be afraid to up the exposure some more, and then some more again! Remember I needed to go to 30 secs at ISO 400 to get the proper effect with my camera. Different cameras will have different filters on the sensors though, so play with your camera to find out what works for you.
  4. Check your focus – AF should still work fine, however, it may shift slightly from what is the correct focus distance (due to light wavelengths). So make sure you check that the things you want in focus are actually in focus.

Cheap ND400 filters

I recently bought a cheap (very cheap) ND400 filter on Ebay for my DA 18-55 AL II lens. I picked the cheap option because I just wanted to play with the effect, but didnt want to spend lots on a filter for a lens I hope to replace soon.

Anyway, back to the point. Colour cast. This is where the quality difference really becomes apparent. The cheap filter produces a very pronounced purple cast. I havent tried to process any of the images yet, it is possible that setting the white balance can overcome the colour cast, but it should not be necessary.

Just another case of getting what you paid for I suppose! I will post some samples of pre and post processing soon.

UPDATE: Shots and details now available.