Tag Archives: lens

Macro Photography Techniques – Part 5

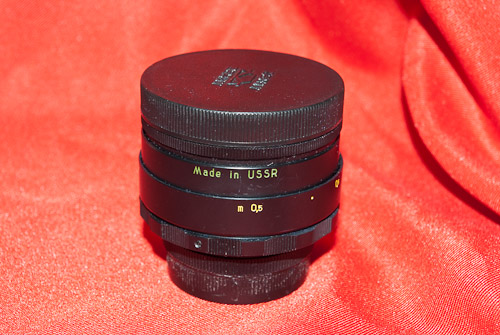
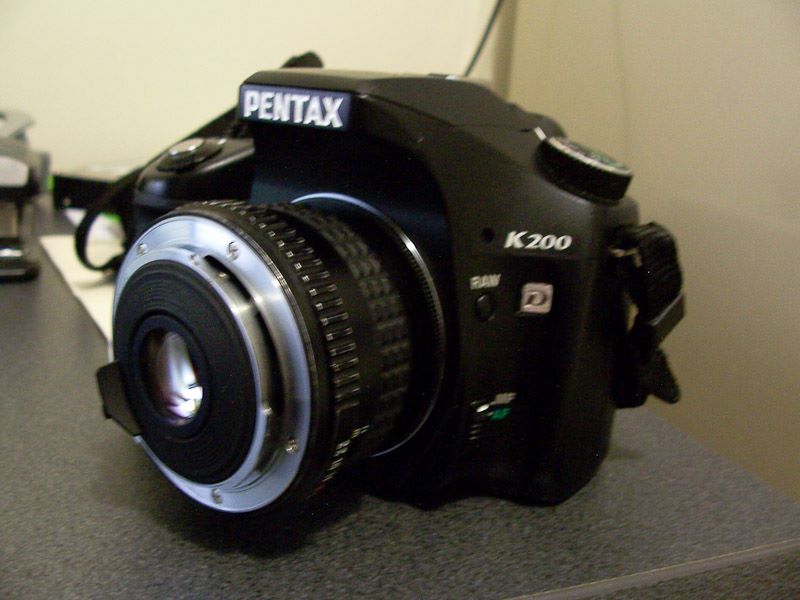
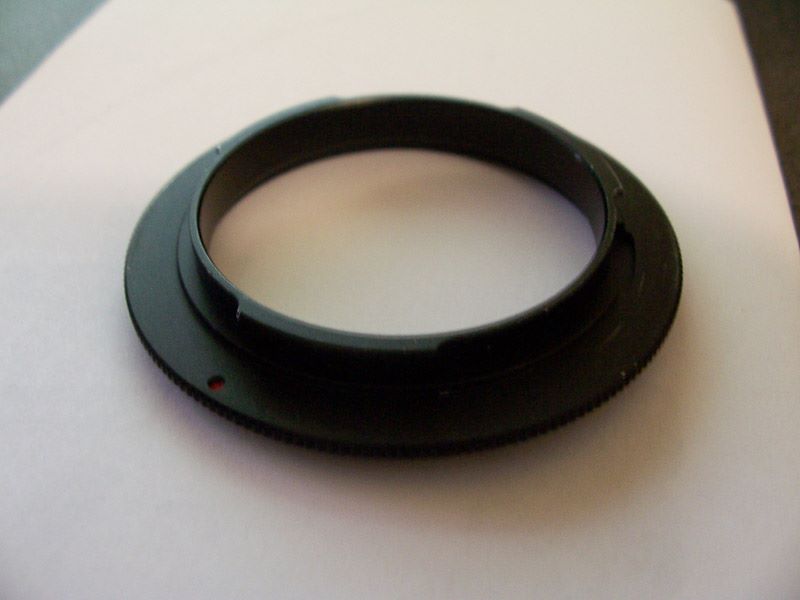
This post in my macro techniques series will cover the other methods, which I haven’t covered yet. But first here are a couple of pictures of a reversed lens (a Pentax SMC “M” 28mm f2.8) mounted on my K200D, and a picture of the reverse mount adapter.

Macro Photography Techniques

  1. Close Focus Lens
  2. Teleconverters
  3. Extension Tubes
  4. Reversed Lenses
  5. Macro Lens
  6. Combining Techniques
  7. Close Up Filters

Other Methods…

There are of course other methods of taking macro photos, which I have not yet covered, the main reason for that is I have not tried them! I don’t want to limit your macro photography methods just by what I’ve done.

A Macro Lens

The most obvious technique I have not mentioned is a true macro lens. A macro lens is a lens which allows 1:1 magnification. Some popular examples are the Tamron 90mm f2.8 Macro, Sigma 105mm f2.8 Macro, Pentax D-FA 100mm f2.8 Macro, Sigma 70mm f2.8 Macro, Canon 60mm f2.8 Macro, Canon 100mm f2.8 Macro and so on. There are also many very good older options, which are manual focus only, so do some research before you buy into this option. The only real downside to this option is the cost. A good Macro lens will set you back at least $300 (even for a manual focus one). This is the only reason I haven’t got 1 myself, although it is on the “One Day” list.

When using a full macro lens the same focusing techniques can be applied. You can set the focus on the lens to the magnification you want (1:1 or 2:1 etc) then physically move closer to, or further from your subject until it is in focus. If your macro lens has Autofocus, this can be of some help, but remember when working with extreme close up photography, the Depth of Field is VERY small, so a slight movement of the camera after focusing can result in out of focus photos. Also the Autofocus sensor in your camera may report the centre to be in focus, but what is really in the centre of the shot? Is it the eyes of your insect subject, or just its wing? For this reason I would still recommend manual focus.

The Good

The good thing about this option is its very simple to use, and you get a great portrait lens for free! (although some may argue macro lenses are a bit TOO sharp for portraits…). It means you can concentrate more on your composition, finding the things to photograph and perfecting your exposure.

Aperture and Flash Again

Again with a macro lens, you will have a very narrow depth of field, as you are so close to the subject. This means you will want to be using a very small aperture, probably around f22 in a lot of cases. So a flash is always a good option. A tall hot-shoe mounted flash pointing down at the subject can work well, or you could point it up and use a reflector of some kind to direct the light output down towards the subject. Another option is to use an off camera flash, off to the side of the subject, again either pointed down towards it, or up with a reflector. If pointing the flash directly at the subject, a large diffuser of some kind is a good option to soften the light and shadows cast.

Examples?

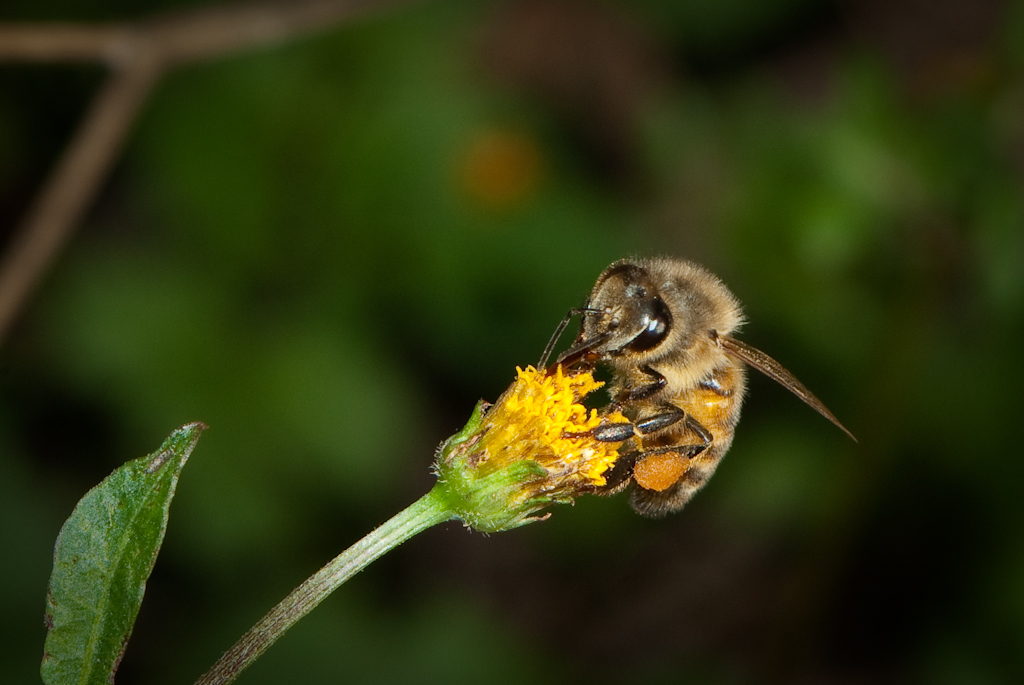
As I have already mentioned, this isnt a method I have used, as I don’t have, or have access to a macro lens. The best I can do is post a shot I took with a friend’s Carl Ziess Flektogon 35mm f2.4 lens, which focuses down to 2:1 magnification. I borrowed the lens for a walk in the Roma St Parklands, while composing another shot, this fly landed right next to me on the wall I was sitting on, so he became the new subject.


Carl Ziess 35mm f2.4 @ f4.0, ISO 100, 1/1000 sec, minimum focus distance (2:1 magnification)

Get out shooting, and enjoy!

Macro Photography Techniques – Part 2

This is the 2nd technique I’ve used when taking macro photos (also the one I’ve used the most).

Macro Photography Techniques

  1. Close Focus Lens
  2. Teleconverters
  3. Extension Tubes
  4. Reversed Lenses
  5. Macro Lens
  6. Combining Techniques
  7. Close Up Filters

Teleconverter with a Close Focus Lens

This technique requires a teleconverter. A teleconverter is an accessory which mounts between your camera and your lens. The effect is increase of focal length. In this case you will probably want a 2x Teleconverter, which is designed to double the effective focal length of your lens. However it does not change the minimum focus distance, so you end up with the same lens, focusing at the same distance, but you get twice the magnification of the image. You can also get Macro Focusing Teleconverters (such as this) which have their own focusing ring, and allow extra magnification, and a good level of control over the magnification.

Drawbacks? Of Course…

The downside of this technique is that a 2x teleconverter, while doubling your effective focal length, it also reduces the effective aperture (incoming light) by 2 stops. So if your kit lens happens to be a Pentax SMC DA 18-55mm f3.5-5.6, and you are wanting to get maximum magnification (55mm @ minimum focus distance) adding a 2x teleconverter will mean that the lens (wide open, where it is a bit softer) becomes 110mm at f11.2. So in order to get a fast shutter speed you will need either high ISO (noisy) or a flash. I have had very good success just using the onboard flash though.

A teleconverter will also exaggerate any quality problems in the lens you are using. If you lens is a bit soft, it will be twice as soft using the 2x teleconverter. So you must be cautious about how you use it. This is where using a flash is also helpful, as it allows you to use a smaller aperture, which will mean the lens is going to be closer to its sweet spot for sharpness.

Another obvious drawback is that you need an extra piece of equipment. I was able to acquire an older 2x teleconverter to fit Pentax K mount on ebay for about $15. It has no “A” contacts (for camera autoexposure) or autofocus. Ideally you would want to have the “A” contacts for auto exposure, however, auto focusing is not required for this technique as you will be using manual focus mode set to minimum focus distance anyway.

Focusing

The same method for focusing is used as for the previous technique. You can read up on that here, in Part 1.

Results

Here are a couple of photos taken using this technique, including settings.

SMC F 35-70mm @ 70mm (effective 140mm), f11 (effective f22), 1/180 sec, ISO 200, onboard flash
SMC F 35-70mm @ 70mm (effective 140mm), f16 (effective f32), 1/20 sec (this should be shorter), ISO 400, onboard flash
SMC F 35-70mm @ 70mm (effective 140mm), f11 (effective f22), 1/180 sec, ISO 200, onboard flash

For those of you who already have teleconverters, why not give this technique a try, and post up the results in the comments.

Macro Photography Techniques – Part 1

This is the start of a series of posts on Macro Photography Techniques which I have successfully used. Each part will be a different technique. Feel free to add any ideas you have as comments, and also to post your macro’s if you have used the techniques before, or after you go and try it!

Macro Photography Techniques

  1. Close Focus Lens
  2. Teleconverters
  3. Extension Tubes
  4. Reversed Lenses
  5. Macro Lens
  6. Combining Techniques
  7. Close Up Filters


The Close Focus Lens

The first technique in the series will be the most obvious one, a close focus lens. A close focus lens is a lens which focuses quite closely, but is not a true macro lens. For example, the Pentax standard kit lens is the SMC DA 18-55mm f3.5-5.6. This lens focuses down to 25cm, which (at 55mm focal length, fully zoomed in) gives a reproduction ratio of around 1:2.9. A true macro lens will allow focusing down to a 1:1 ratio (older Macro lesnes are actually only 1:2). Even with 1 of these types of lenses some great macro shots can be created. Most DSLR owners will have a close focusing lens as most kit lenses are close focusing so its a technique anyone can try (and most would have).

Getting The Most From It – Focusing

The key with a close focus lens is being able to focus on something, with the sensor plane as close as possible to the subject. You need to make sure you are at that minimum focusing distance when you take the shot to get the maximum possible magnification from your lens. The easiest way to do that, is to set your camera (or lens, depending on model) to manual focus, and set the focus manually to the minimum focus distance. Once you have done that, all you need to do is to get nice and close to your subject, and focus by moving the camera (and probably yourself too) further away from, or closer to the subject as required. This will mean you get the maximum magnification because the lens is pre-set to the closest possible focus point. By moving the camera you move the subject into the correct distance and into focus.

This is the focusing technique I use for all my macro photography, so will apply across this whole post series. To help you achieve correct focus most cameras will have a focus confirmation of some kind, even in manual focus mode. Pentax cameras have a focus confirmation beep (which can be disabled) as well as a green hexagon displayed in the view finder once focus is confirmed. However, when using manual focus only the centre focus point can be used, so you must point the centre of the frame at the subject while focusing.

Depth Of Field – It’s Too Narrow!

With macro photography narrow depth of field can become an issue. When you are so close to your subject, and have a longish focal length, it will cause your depth of field to become very narrow. The only way to increase it is to use a smaller aperture (larger f number, eg f22). This will make your shots very dark, or your shutter speeds very long. To overcome this, you could use a flash. An off camera flash is preferred, but the on camera flash can work just fine too, especially with a reflector (I’ll explain that in a later post).

What this means for you, is (as always) the photo becomes a balancing act between shutter speed (fast to avoid blur), aperture (small to get the DOF you want) and ISO (low to avoid noise).

The Results

Here are a few shots I have taken using this method. Including the settings used.

SMC M 28mm f2.8 @ min. focus + cropped – ISO 100, 1/100 sec, f4.0 (from memory)
Tokina RMC 70-210mm f3.5 @ 210mm min. focus + cropped, ISO 200, 1/640 sec, f3.5

Time to get out and take some macros. Don’t forget to post the results in the comments section. Stay tuned for the rest of the posts in this series.

More Russians

Some more russian lenses I have thought of since my previous post on the subject which are quite well regarded. Also wanted to mention the fact that I have finally ordered a Jupiter-9 85mm f2.0 M42 mount lens. It may take a few weeks to arrive from Russia itself though. Anyway, back to the lenses. This list should get you started on a collection of great fun Russians

  • Zenitar 16mm f2.8 fisheye (still made new in all mounts)
  • Mir-20 20mm f3.5 (quite wide on a film or full frame SLR)
  • Mir-24 35mm f2.0
  • Mir-1 37mm f2.8 (but the later Mir 1-B is reported to be a bit soft)
  • Volna-9 50mm f2.8 Macro around 1:2
  • Industar 50-2 50mm f3.5 pancake (VERY small)
  • Industar 61 LZ 50mm f2.8 also Macro around 1:2
  • Helios 44 series 58mm f2.0 (some discussion about which is best HERE)
  • Jupiter-9 85mm f2.0
  • Helios 40 series 85mm f1.5
  • Tair-11a 135mm f2.8
  • Jupiter 37 135mm f3.5
  • Jupiter-21 200mm f4.0
  • Tair-3 300mm f4.5

Tair-11A 135mm f2.8

As I mentioned in an earlier post. I bought a Tair-11A M42 mount lens on Ebay. I have seen great shots from this lens on flickr, and read plenty of great reports on it. This lens is 135mm prime, aperture is a preset adjustment and ranges from f2.8 to f22. It focuses from 1.2m to infinity and has a small built in hood.

It truely is an amazing lens. Incredibly sharp, very smooth bokeh (out of focus highlights) and is a joy to use with a lovely smooth focusing ring. Here are some shots I’ve taken with it since it arrived.

First a bokeh test
Then this little bird came along
And to prove how sharp this lens is – this is a 100% crop of the bird from another shot
And a technique tester shot. A panorama to get the narrow DOF effect. I’ll explain this technique in a later post

Cheap ND400 filters Pt 2

Here we go, finally have a shot I can post from my cheap Ebay ND400 filter.

This shot was very underexposed. I allowed for about 9.5 stops of extra exposure (I use the PhotoBuddy app for the iPhone to work out exposures) but I would say this particular filter needs more like 11-12 stops extra. A Hoya ND400 filter is specified as a 9 stop filter. This shot has +4 stops of exposure in PP (Lightroom) and the colour cast is mostly corrected (but not totally) by adjusting the white balance. Here are the settings from lightroom and the shot. Its nothing special but it does display the problems with the colour, and obviously incorrect number of light stops filtered. As you can see I am at the limit of adjustment for white balance, but the photo still shows a slight purple cast. This means you will not get true colours from this filter.

Russian lenses

I believe I may have a problem… I thought I had enough lenses for a while, until I saw a Helios 44-2 M42 lens (58mm f2.0) for a tiny $15, I did a quick search of Flickr and liked the look of the images from it. I bought it and its a great lens, not just great value for $15, but just a generally great lens! This lens led me into researching Russian lenses in general. I then was able to get a Mir-1 (37mm f2.8) M42 from the PentaxForums trading section from an Australian member, it included the lens, original hard plastic case and instruction in russian. I just recently replaced my Hanimar 135mm lens with a Russian Tair-11A 135mm f2.8 M42, and hope to add add the very popular Jupiter 9 (85mm f2.0) M42 lens to my collection. If you don’t know much about these well regarded (and quite cheap) Russian made lenses, I suggest you look into them.