Category Archives: Landscapes

A Roll In A Field


A Roll In A Field
Originally uploaded by jezza323

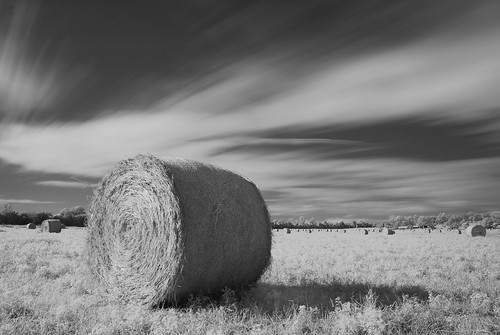
My friend and i spotted this paddock of hay bales on the side of the highway on the way back from our early morning shoot at Lake Moogerah. I’ve always wanted to shoot something like this, so it was great to get the opportunity.

Taken with the Pentax K200D, Pentax SMC DA 18-55 AL II lens, Hoya R72 filter and Slik 500DX Pro tripod. I handheld the shutter on this bulb, almost 3 mins!

Processed in Lightroom 2.5, adjusted white balanced, converted to greyscale, and minor contrast adjustment.

The Sun is Coming


The Sun is Coming
Originally uploaded by jezza323

The first of many shots I will be posting from my Sunday morning trip to Lake Moogerah for sunrise. This was a 71 sec exposure, taken pre-sunrise, using the Pentax K200D, Pentax SMC DA 18-55 AL II, Hoya R72 infrared filter and Slik 500DX Pro tripod.

It was shot in RAW (PEF) and I processed it using Lightroom 2.5, changed white balance (need to for infrared shots), and converted to greyscale, that was about all!

Lake Moogerah Sunrise in IR


Lake Moogerah Sunrise R72
Originally uploaded by jezza323

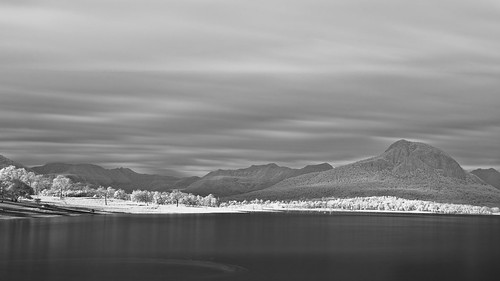
Here is another case of using my Hoya R72 infrared filter for a daytime long exposure black and white shot. This was shortly after sunrise during my camping trip to Lake Moogerah a few weeks back.

The long exposure gives the clouds the nice blanket effect, and the patch of sunlight gives a nice IR effect, but the lack of light on the hills/mountains means they do appear a bit flat.

Moogerah Milky Way


Moogerah Milky Way
Originally uploaded by jezza323

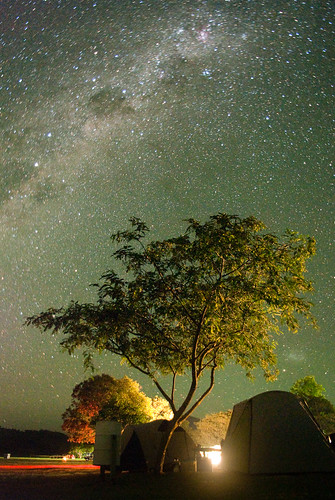
I spent the weekend just gone camping out at Lake Moogerah, about 1.5 hrs drive south west of Brisbane. I went on Friday night after work, and returned just before lunchtime on sunday. The sky was beautifully clear on Friday night (despite a tropical cyclone hitting the coast about 1000 km’s away). So immediately after setting up camp, we broke out the tripods and cameras and started snapping the amazing stars which were visible.

People who have seen this shot keep asking how I knew where to point the camera, but its very easy, you can see almost as much as this with the naked eye. It really is amazing how much light pollution kills the view of the stars.

I went with a good mate of mine, and my fiance. It was due to be a boys photography weekend, but when my fiance said she wanted to come and check out this whole camping caper, who was I to say no? She enjoyed viewing the stars, and the two of us took enough photos to last a few weeks of PP.

This shot was taken using the K200D and the Pentax SMC DA 18-55 AL II kit lens. I set the lens to f4.0, as it is slightly soft wide open, 18mm because I wanted the shot as wide as possible (I really wish I could have gone wider! When Zennon posts his shots with the Sigma 10-20mm I will be sure to share them). I set the ISO to 1600, the camera’s inbuilt long exposure noise reduction to ON, and the mode to Bulb.

Carefully I aimed my shot at our campsite (yes those are our tents, my fiance is even in the one on the right sleeping) and started the exposure using a cable remote (with a lock). I could lie and said I timed the exposure to perfection, but in reality I just waited till I thought it might be a good time to stop, and unlocked the shutter button on the cable remote. This is where it gets frustrating….now I had to wait again as long as the shutter was open for the noise reduction to process.

What happens here is the camera takes another exposure, the same length, at the same ISO, but with the shutter closed. This creates a dark frame, but with all the same noise/hot pixels as the original shot. The software in the camera then subtracts this dark frame from the original, which leaves it with much less noise.

I was immediately happy with this shot upon seeing it on the LCD, but I was unable to get more the same. The dew in the air was at all time record highs it would seem, anything and everything exposed to it was getting covered with a lovely layer of moisture, including my lens. Everytime I tried another long exposure after this one, the lens would fog up so badly it would ruin the shot.

This was processed in Lightroom 2.5 with the only the following 2 changes, Brightness +87, Contrast +51

I am really keen to head back to the camping spot for more of these kind of shots in the near future. Hopefully after I have myself a wider lens. I am currently looking at something like the Sigma 10mm f/2.8 EX DC Fisheye, which would give great views of the milky way, and allow me to do little planet photos and VR tours. Lets keep hoping!
Project 52 – #9 – Old Customs House


Old Customs House
Originally uploaded by jezza323

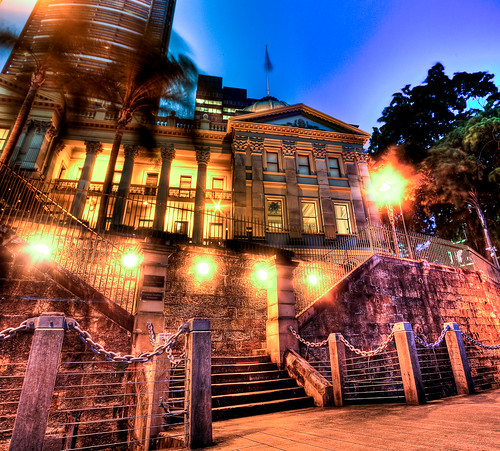
This is a shot of the Old Customs House in Brisbane. This is the view from the Brisbane Riverwalk.

This shot is another HDR Panorama, this time blended at stitched from 12 photos. It is stitched from 4 HDR images in a 2×2 layout using Autopano Giga, and each HDR image was shot at +/- 2.0 EV and then blended using Photomatix with the Batch Processing function, using Details Enhancer for Tone Mapping.

Shooting and Processing

  • Shot all 12 photos in Pentax RAW (PEF), 4 lots of +/- 2.0 EV brackets
  • Imported all images from memory card using Lightroom 2.5
  • Exported all 12 photos to a new subfolder as 16bit TIFF files
  • Opened Photomatix and ran Batch Process over the new subfolder
  • Opened Autopano and selected the 4 resulting TIFF HDR images to stitch
  • Rendered the created panorama to another 16-bit TIFF
  • Imported final TIFF into Lightroom 2.5
  • Edited white balance (its a hard one because the Riverwalk is lit with different colour lights to the lights on Customs House and cropped image
  • Exported to JPG for Web

Project 52 – #8 – Japanese Garden, Mt Cootha


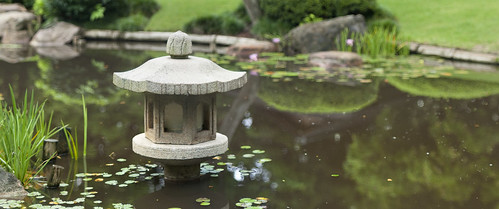
Japanese Garden, Mt Cootha
Originally uploaded by jezza323

I am a little behind, but I hope to catch up this week. We have had rainy weather non stop for a couple weeks now. Yesterday I got out amongst the showers in the Mt Cootha Botanic Gardens, and in particular wanted to visit the Japanese Garden. You can read about the garden here.

Over the last week or so I’ve been discussing shooting in various different aspect ratios with a friend at work. He had the idea to shoot only in a particular aspect ratio for a bit. After this discussion I decided to copy his idea a little, and try shooting some stuff in the movie aspect ratio of 2.39:1 (my friend has decided on 16:9 btw). This is from my first shoot where I specifically considered shooting in this aspect. I dont plan on taking lots of shots in this aspect ratio, but it is fun to consider.

This is a Brenizer Panorama, taken with my Pentax K200D and Jupiter-9 85mm lens at f2.8. I stitched the shots using Autopano, then did some editing in Lightroom 2.5 to get the final result (crop, contrast, exposure, blacks)

Brisbane Airport in Action


Brisbane Airport in Action
Originally uploaded by jezza323

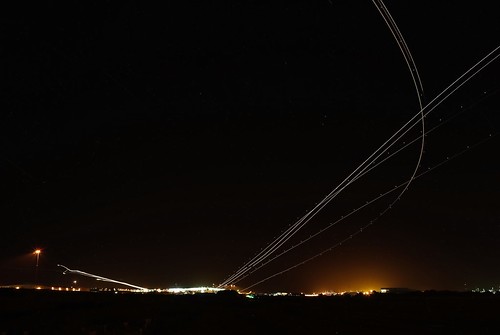
Here is another example of using Startrails.exe for something other than startrails. This shot was taken almost a year ago now, its made of many 30 sec exposures stacked together to get the multiple trails of planes coming in to land, and taking off.

This shot is another example of using startrails for adding elements into a shot

Project 52 – #7 – Wellington Point


Sunrise and The Tree
Originally uploaded by jezza323

The sunrise at Wellington Point in Brisbane is a popular location for local photographers. The sun is rising just to the right of frame in this shot, you can see the orange/red glow off the top of the clouds. This is landmark #7 in my Project 52 Brisbane Landmarks for 2010.

Taken with the Pentax K200D and Pentax SMC DA 18-55 AL II @ 18mm, Kenko CPL, TianYa ND8 and TianYa ND8 Grad Filters (thats a whole lotta filters…I didn’t need the ND8 but it was already in the holder from an earlier shot).

Single exposure processed in Lightroom 2.5 with exposure graduated mask, clarity, white balance, contrast, exposure and fill lights adjustments.

EDIT: I just realized I had this marked as landmark #6! It is actually landmark #7.

Wellington Point Pier – Hoya R72


Wellington Point Pier
Originally uploaded by jezza323

Buy art

 
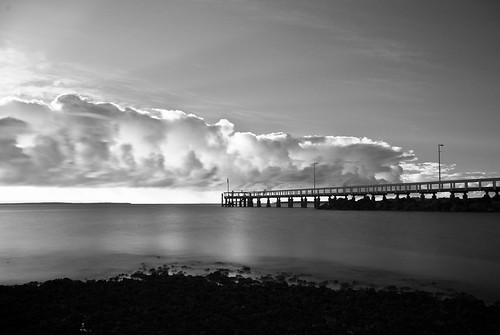
Wellington Point Pier at sunrise while the sun was behind a large bank of clouds.

Single exposure taken at 18mm with the Pentax K200D and Pentax SMC DA 18-55 AL II lens. Shot at f8.0, 30 sec, ISO 200.

This shot is Infrared, shot using a Hoya R72 filter. All editing done in Lightroom 2.5 (clarity, blacks, white balance, greyscale, contrast)

I really like the extra contrast you get with the R72 filter. The required long exposure didnt hurt the smoothness of the water either