I have had a few people asking me what my process or method for processing HDR images is over the last few days, so here is a detailed run down of how I shoot, process, blend and publish my HDR images. I will split this up into a number of shorter posts, but I will try to get through all the steps as quickly as I can over the next few days.
HDR Photography
- Shooting a HDR
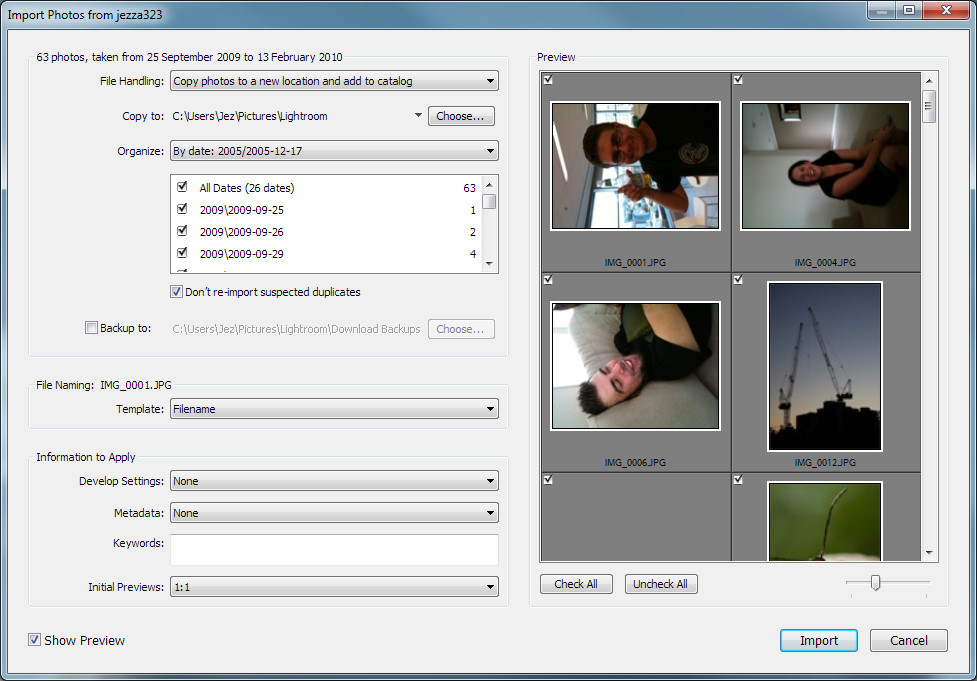
- Getting it off the Camera
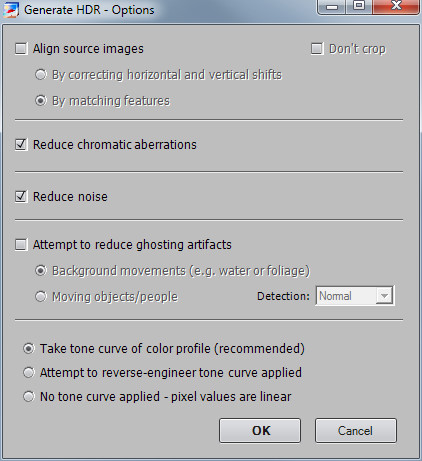
- Blending Time
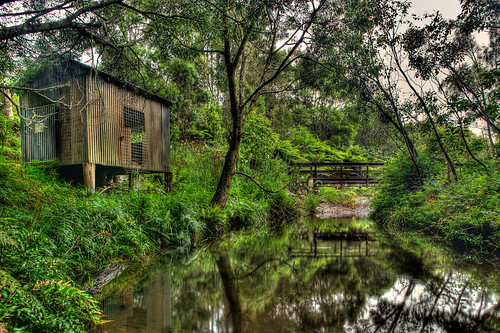
- Final Processing
- Some Inspiration
Shooting a HDR Image
HDR stands for High Dynamic Range, and a HDR image is an image where the range of brightness displayed in that single image is more than you would normally get from a single photo. In a HDR image you are compressing really bright stuff, and really dark stuff into a more evenly lit image. By doing so you can make out the detail in the darker areas, and the detail in the bright areas, where normally, you would just see black, or white sections.
There are 2 main ways of shooting a HDR image. The first is to shoot a single frame, and have it saved as a RAW file (RAW files contain a wider range of brightness information for each pixel than a JPEG file). You can then compress the wide range of brightness in that file down into a HDR image. I rarely use this method, as I always shoot RAW anyway, and only use HDR when there is need to capture a wider range of information than a single RAW can capture.
The 2nd method is to shoot multiple frames of the same scene at different exposures, which is called “Bracketing”. Most new digital cameras give you the ability to shoot in a bracketing mode. When shooting in this mode, the camera will take 3 (or more) images at varying exposures. By doing so, you are able to capture the detail in the image over a much wider range of brightness. When you blend these 3 (or more) exposures together, you end up with a HDR image. This is the method I use for shooting my HDR images.
Bracketing Shots
If your camera gives you the option to shoot in Bracketing mode, it will often allow you to select the spacing between the exposures of each image. With my Pentax K200D camera, I am able to adjust the exposure brackets from 0.3 EV spacing, up to 2.0 EV spacing, in 1/3 EV steps (0.3, 0.7, 1.0 etc). Most people seem to recommend shooting your brackets at +/- 2.0 EV. This gives a good range of exposure, without going too far apart in your images. When shooting your brackets, it is very helpful to use a tripod. This will prevent any problems in blending the final image due to misalignment of the images, but it also helps to prevent camera shake causing blurry shots, especially for the +2.0 EV shot, as the shutter speed for this shot will be quite slow.
Other Settings
Most of my HDR shots are of buildings/landscapes and other things which do not move and require a large Depth of Field. So when shooting this type of scene I recommend shooting in Aperture Priority mode on your camera, with the aperture set to around f13 or even f16 (where possible, see 2 paragraphs down for why it might not be). Shooting in Av (aperture priority) will give the best control over your depth of field, using aperture priority mode when bracketing means that the camera will only adjust the shutter speed for your brackets. By locking the aperture down, it means the depth of field remains constant throughout the bracketed images.
It is also possible to use Shutter Priority mode for shooting your HDR, however this means the camera will adjust the aperture +/- 2.0 EV stops for each bracket, giving you varying depth of field, which may result in some parts of the scene being out of focus for the +2.0 EV image (where the aperture will be the widest).
A lot of my HDR’s are in poor light, so I almost always use ISO 100 with longer exposures to ensure the least possible amount of noise. Something to watch out for though is the 30″ (second) maximum shutter time limit on most DSLRs. If you’re 0.0 EV image requires a shutter speed of anything greater than 2 stops less than 30 seconds (7.5″ is 2 stops less than 30″) it means that your +2.0 EV shot will not be a full 2 stops brighter. For this reason I try to adjust the ISO and aperture until I am able to get the 0.0 EV shot down to at least a 10″ shutter speed. By ensuring I have at least 1.7 stops of headroom in shutter speed I am able to use the longer shutter speed shot to get the details out of the darkest areas in the image.
Extra Dynamic Range
n some cases (not very often though) a +/- 2.0 EV bracket does not give enough range in light, and you still have blown out highlights, or blacked out shadows. Some cameras allow you to specify a wider range for bracketing, but my camera does not. So a little trick I have learnt is to use the exposure compensation (or exposure bias) to help fill those ranges. What I do is set the exposure compensation to -2.0 EV, and then shoot a 3 image bracket at +/- 2.0 EV. This results in shots at -4.0 EV, -2.0 EV and 0.0 EV. Then I quickly reset the exposure compensation to +2.0 EV and shoot another 3 image bracket. So in total I have a -4.0 EV, -2.0 EV, 2x 0.0 EV, +2.0 EV and +4.0 EV images. When processing, I simply discard 1 of the 0.0 EV images and blend away.
I hope this helps you get your HDR shot. In the next post I will cover my workflow for processing HDR’s up to the tone mapping stage.